Gauge and Swatching Explained
When you first start to knit you may not be aware of the concept of gauge. It can seem tricky enough learning how to cast on and create a knit and purl stitch, right? However, once you have mastered the basics and fancy knitting a larger project, such as a garment, it is important to spend some time looking into gauge and tension. There is nothing worse than spending hours and hours knitting away on a beautiful jumper then to realise that it’s come out way to small or big to wear!
So what is gauge or tension?
Often the terms ‘tension’ and ‘gauge’ are used interchangeably and mean very similar, if not the same thing in the knitting world. Generally speaking, ‘tension’ refers to how tight or loose the knitted fabric is and ‘gauge’ is the measurement of tension – I.e. how many stitches and rows are required to create the fabric per unit of measurement (centimetres/cm2 or inches/in2). This is a really important concept to understand if you want to start creating garments and you want them to fit correctly.
Let’s break it down a little by looking at an example:
Someone could be considered a ‘tight knitter’ or have a tight tension when the fabric they create is ‘dense’ and they have a high number or stitches/rows per cm/in (tight gauge). A garment knit with tighter gauge/tension than the pattern recommends would result in the item being smaller than expected.
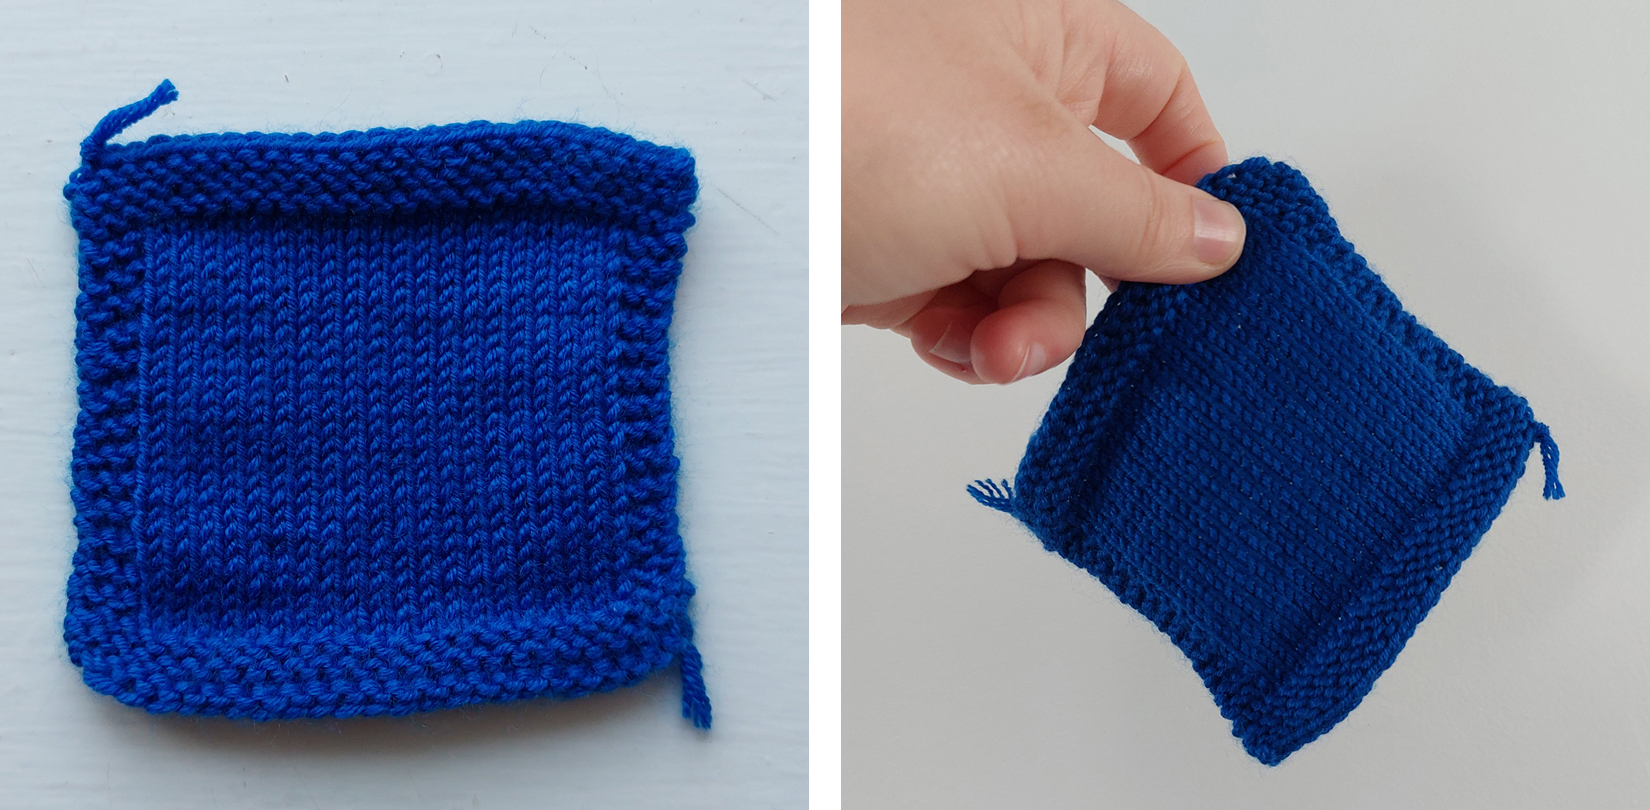
Someone could be described as a ‘loose knitter’ or have loose tension when the fabric they create using the same needles and yarn has a low number of stitches/rows per in/cm (loose gauge). This results in a fabric more open fabric. A garment knit with looser gauge/tension than the pattern recommends would result in the item being bigger than expected.
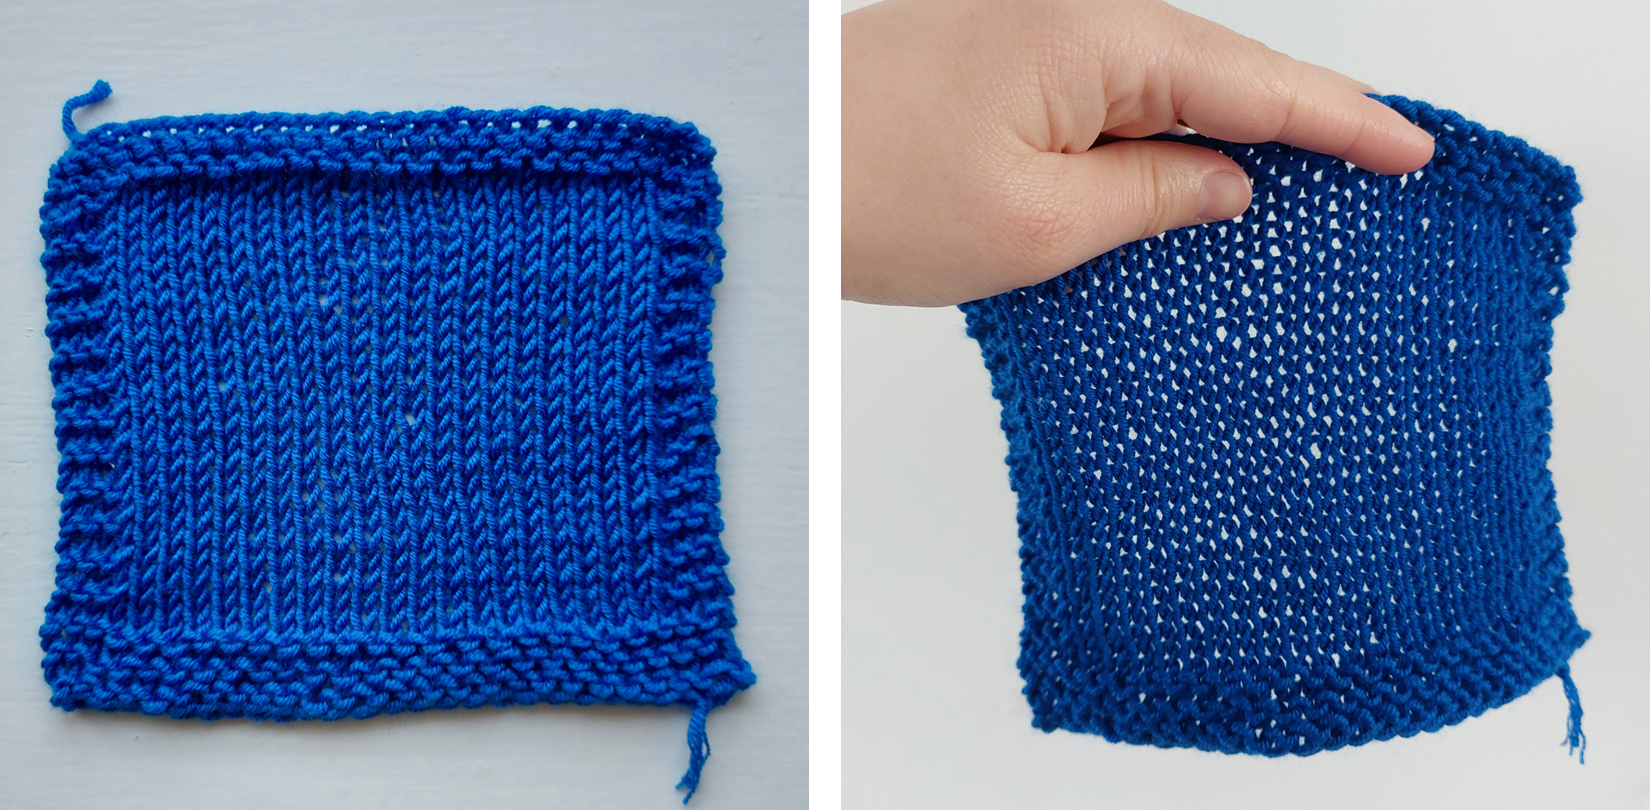
Knitting tension is very personal. Everyone knits at different tensions by nature and there are many variables that may affect tension. Generally speaking, new knitters will knit with a tighter tension as they get to grips with holding the yarn/needles and become confident with the new skills they are learning. Other variables that affect tension may be the size of needle used and possibly the material they made from (e.g. wood or metal needles) or the type of yarn and fibre composition. The stitches/pattern used also have a great effect on fabric gauge. For example, cabled patterns create a tighter fabric compared to simple stocking stitch. Lace patterns often create a looser fabric.
This all sounds impossibly complicated right? Where on earth do you start trying to work out what your tension is and whether it will create the garment you want? Don’t threat, when tension/gauge matters in a pattern, the information you need will be given to you!
What does gauge information look like?
What you need to know for gauge is how many stitches and rows are required to create a ‘size’ of fabric. This information is most commonly shown as the number of stitches and rows needed to create a 10cm by 10cm (4in by 4in) square. You also need to know whether the gauge was based on a fabric that was knit flat or in the round and if the gauge was measured on pain or patterned/textured fabric. It is important to test your own gauge in the same way as the pattern gauge you are trying to replicate.
Here is an example of how you may see gauge information displayed:
“This pattern is knit flat in garter stitch with a gauge of 10 stitches and 20 rows = 10x10cm (4x4in)”.
Why does gauge matter when knitting a garment?
When designers create a pattern, they measure their knitting to determine the gauge of the fabric. By working out how many stitches and rows there are in a unit of measurement. For example, how many stitches and rows are in 1cm2 or 1in2. Designers then work out how many stitches and rows are needed to achieve the garment measurements for each size in their pattern. This is why it is so important to check your tension and compare it to the pattern recommended gauge before starting a big project.
(For the knitter, gauge information is usually displayed over 10cm2 (4in2) as it is far more accurate to measure your stitches over a larger surface area). If you create a fabric that has more or less stitches and rows per 10cm (4”) then your garment will end up a different size to what it should be. Using the example above, if the designer bases their measurements on 10 stitches for every 10cm (4in) but your tension is 12 stitches to every 10cm (4in), your garment will end up 20% smaller than intended. Likewise, if your tension is only 8 stitches to every 10cm (4in), your garment will end up 20% bigger.
Having a tighter or looser tension than the person who designed the pattern doesn’t mean you are doing it wrong or you are a bad knitter, it just means you knit slightly differently and will end up with different results. Therefore, you may need to make some changes to ensure you get a garment you will be happy to wear. We will go into more details on how to adjust gauge later.

How do I measure my tension/gauge?
By making a gauge swatch! A gauge swatch is a ‘test’ piece of fabric which is created to demonstrate what the finished garment fabric should be like using the yarn and needles you have selected.
This is how you make a gauge swatch:
Step 1: Choose the needle size and yarn recommended in the knitting pattern.
You might decide to change this later, but it’s best to start with those which the designer has used as you may not need to make any changes to achieve the same gauge.
Step 2: Cast on your stitches.
It is good practice to cast on extra stitches than what the instructions recommend as it makes it easier to measure later on. For example, if the instructions say to cast on 20 stitches, it may be helpful to cast on 26 stitches – giving you an extra 3 either side of the recommended amount. If the gauge swatch is given for a set pattern, you may wish to cast on enough extra stitches to repeat the pattern at least one extra time (e.g. if a pattern is repeated every 4 stitches, cast on extra stitches in multiples of 4 stitches in order to make the extra space for full pattern repeats).
Step 3: Now knit the swatch according to the pattern specified. Lets use another example: “This pattern is knit flat with a gauge of 20 stitches and 28 rows = 10x10cm (4x4in) in stocking stitch”. This swatch needs to be knit flat and in stocking stitch. Flat means back and forth in rows and stocking stitch means knit right side rows and purl wrong side rows. If the recommended number of rows for the swatch is 28, try knitting 34 rows. If your gauge is correct you will end up with a swatch bigger because of the extra rows added but like with the added stitches, this allows for a more accurate reading of your gauge when measuring.
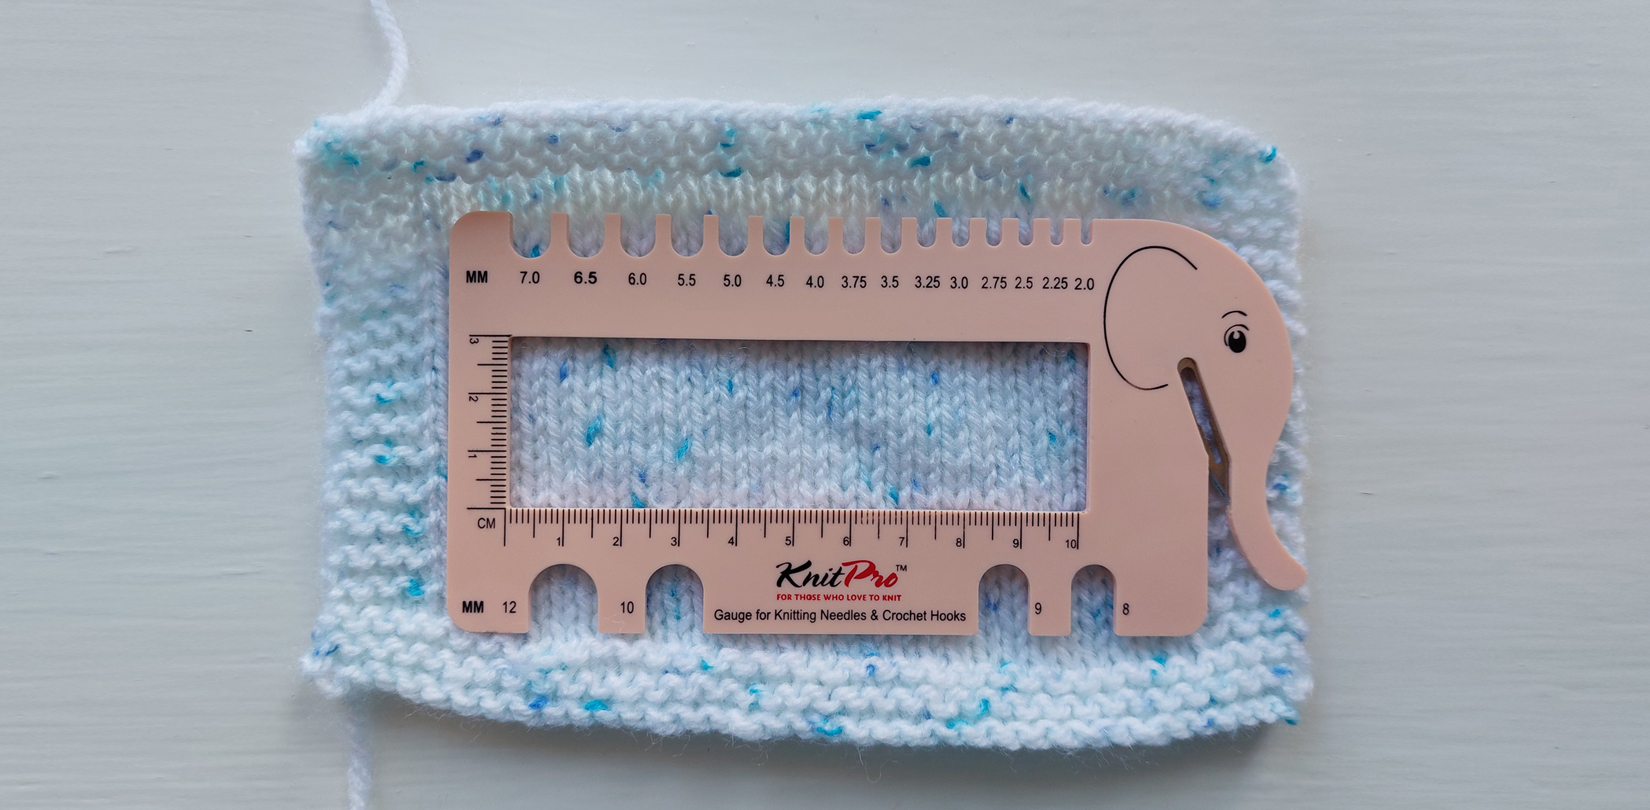
Step 4: Time to block your swatch. Blocking is a process where a piece of knitted fabric is wettened or dampened and then left to dry. This is an important step in the swatching process as it evens out the stitches which means a more accurate measurement will be taken. Many yarn types and stitch patterns change significantly under blocking so it is not uncommon to get a very different measurement from an unblocked swatch. Please see the ‘How to Block your Work’ blog for more information.
Step 5: Now your swatch is complete, it’s time to measure it. This can be done with a gauge ruler, or just a regular measuring tape. Using the same example, If your gauge is the same as intended, there should be 20 stitches in 10cm (4in) horizontally and 28 rows in 10cm, vertically.
If everything measures up perfectly, then you’re ready to start knitting your piece! If, however, your measurements don’t line up with that of the pattern, don’t worry! If you want to know more or are still struggling with gauge, you can also check out our blog ‘What To Do When You Just Can't Get the Gauge’ to delve a little deeper! Hopefully this blog had levelled up your knitting knowledge and given you the tools needed to venture into bigger knitting projects, such as garments!