How to Knit an I-Cord
A knitted I-cord is a very useful and versatile thing. They are most often used for ties which may accompany the item you are knitting. Here, they have been used to create little loops to hang this Christmas decorations on a tree.
Knowing how to knit an I-cord is a handy skill to learn, and is a pretty easy one too! Here’s how its done!
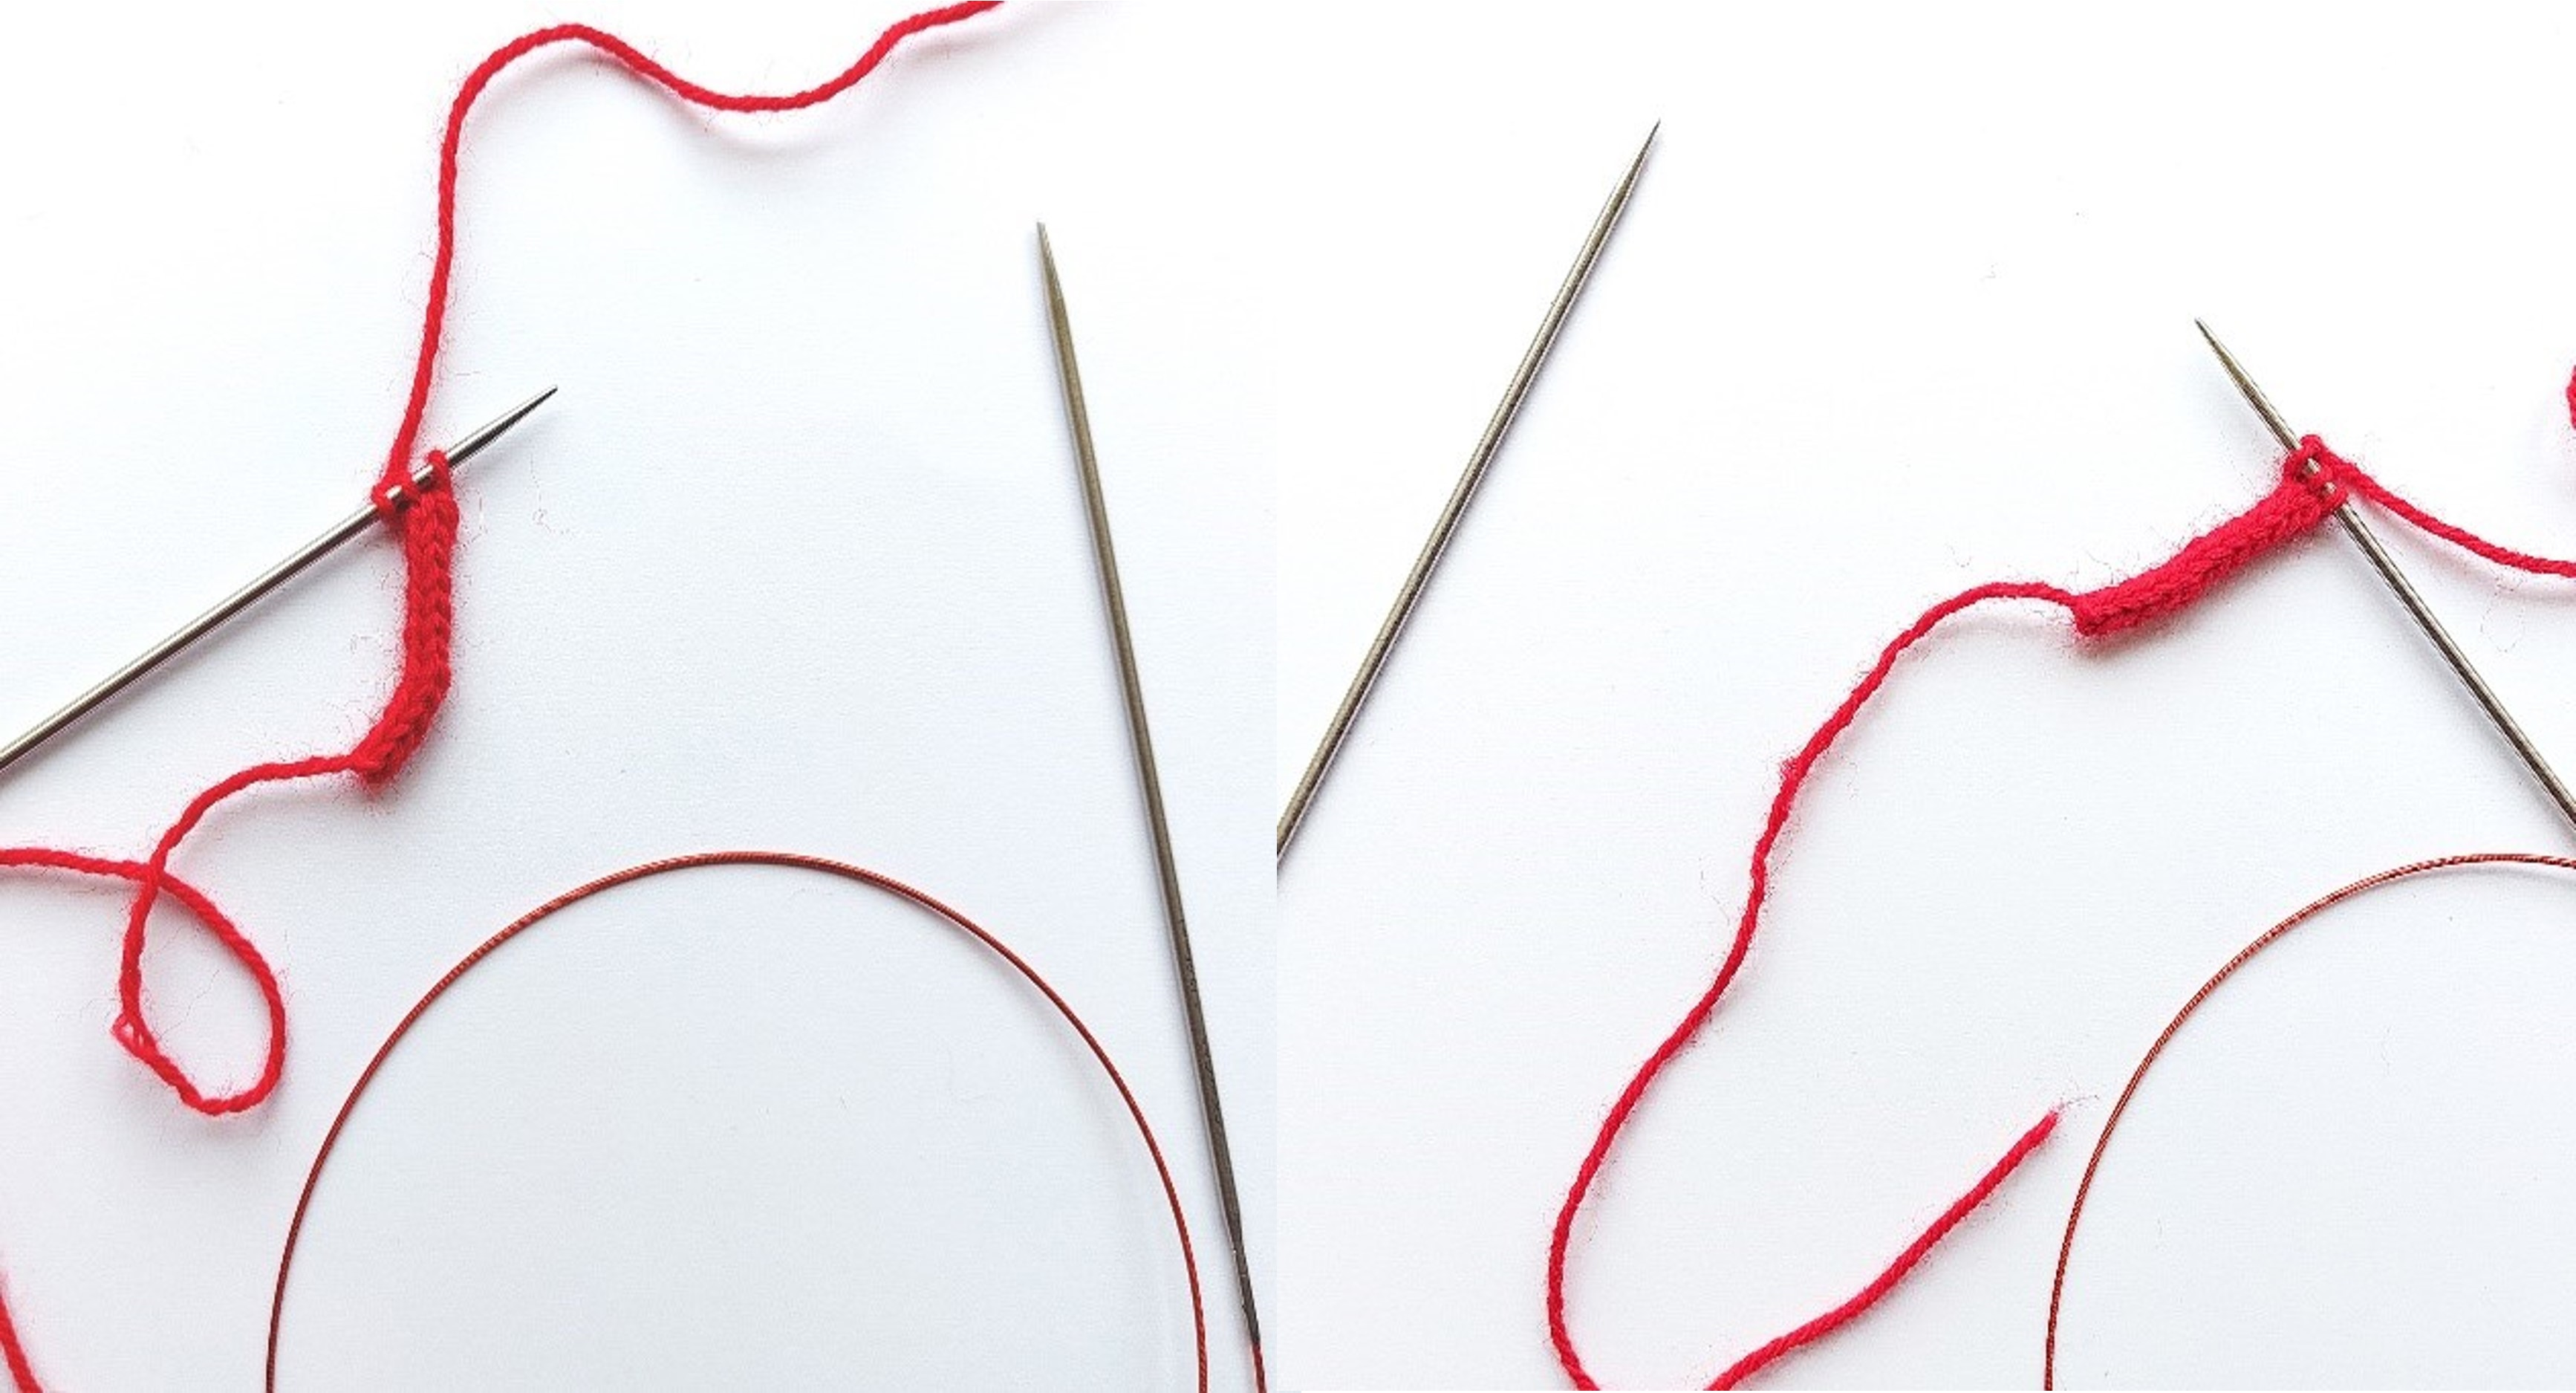
Step 1: Choose the type of needle you would prefer to work with. Double pointed needles and a long circular needle are shown here but you can also use standard straight needles. The way you work your I-cord will depend on the needle type you are using.
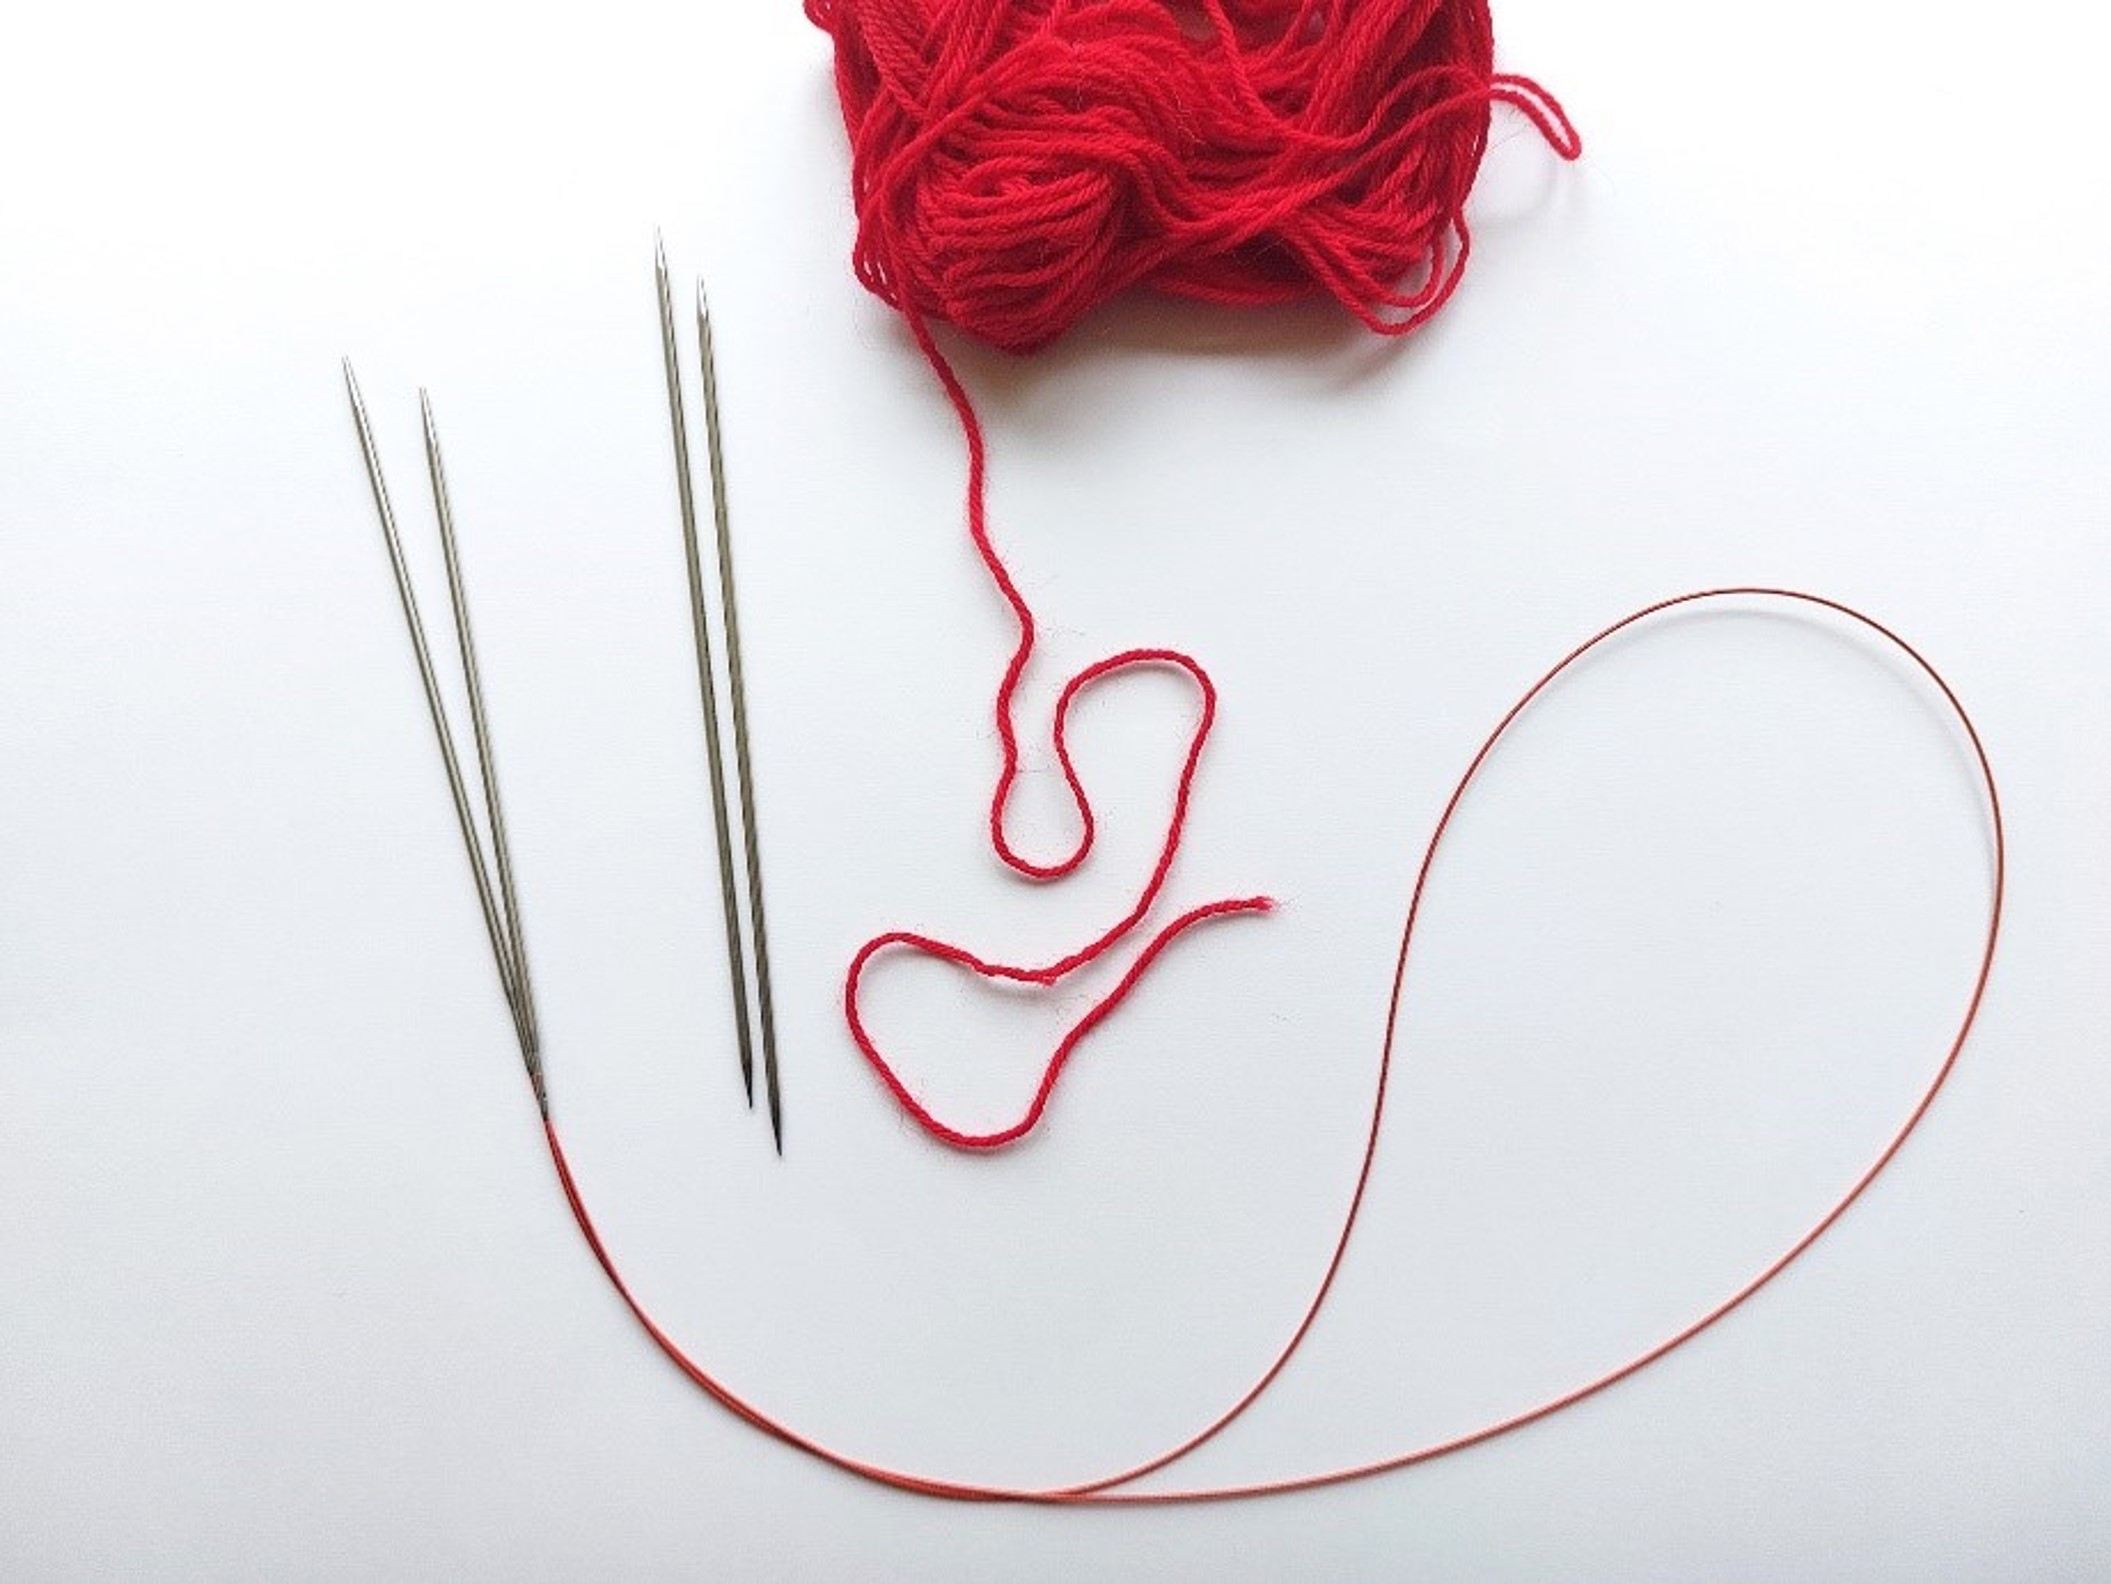
Step 2: Cast on 3 stitches using whichever cast on method you prefer. A 3 stitch I-cord is the most common but and larger or smaller number of stitches can be used depending on the weight of yarn and the size of I-cord required.
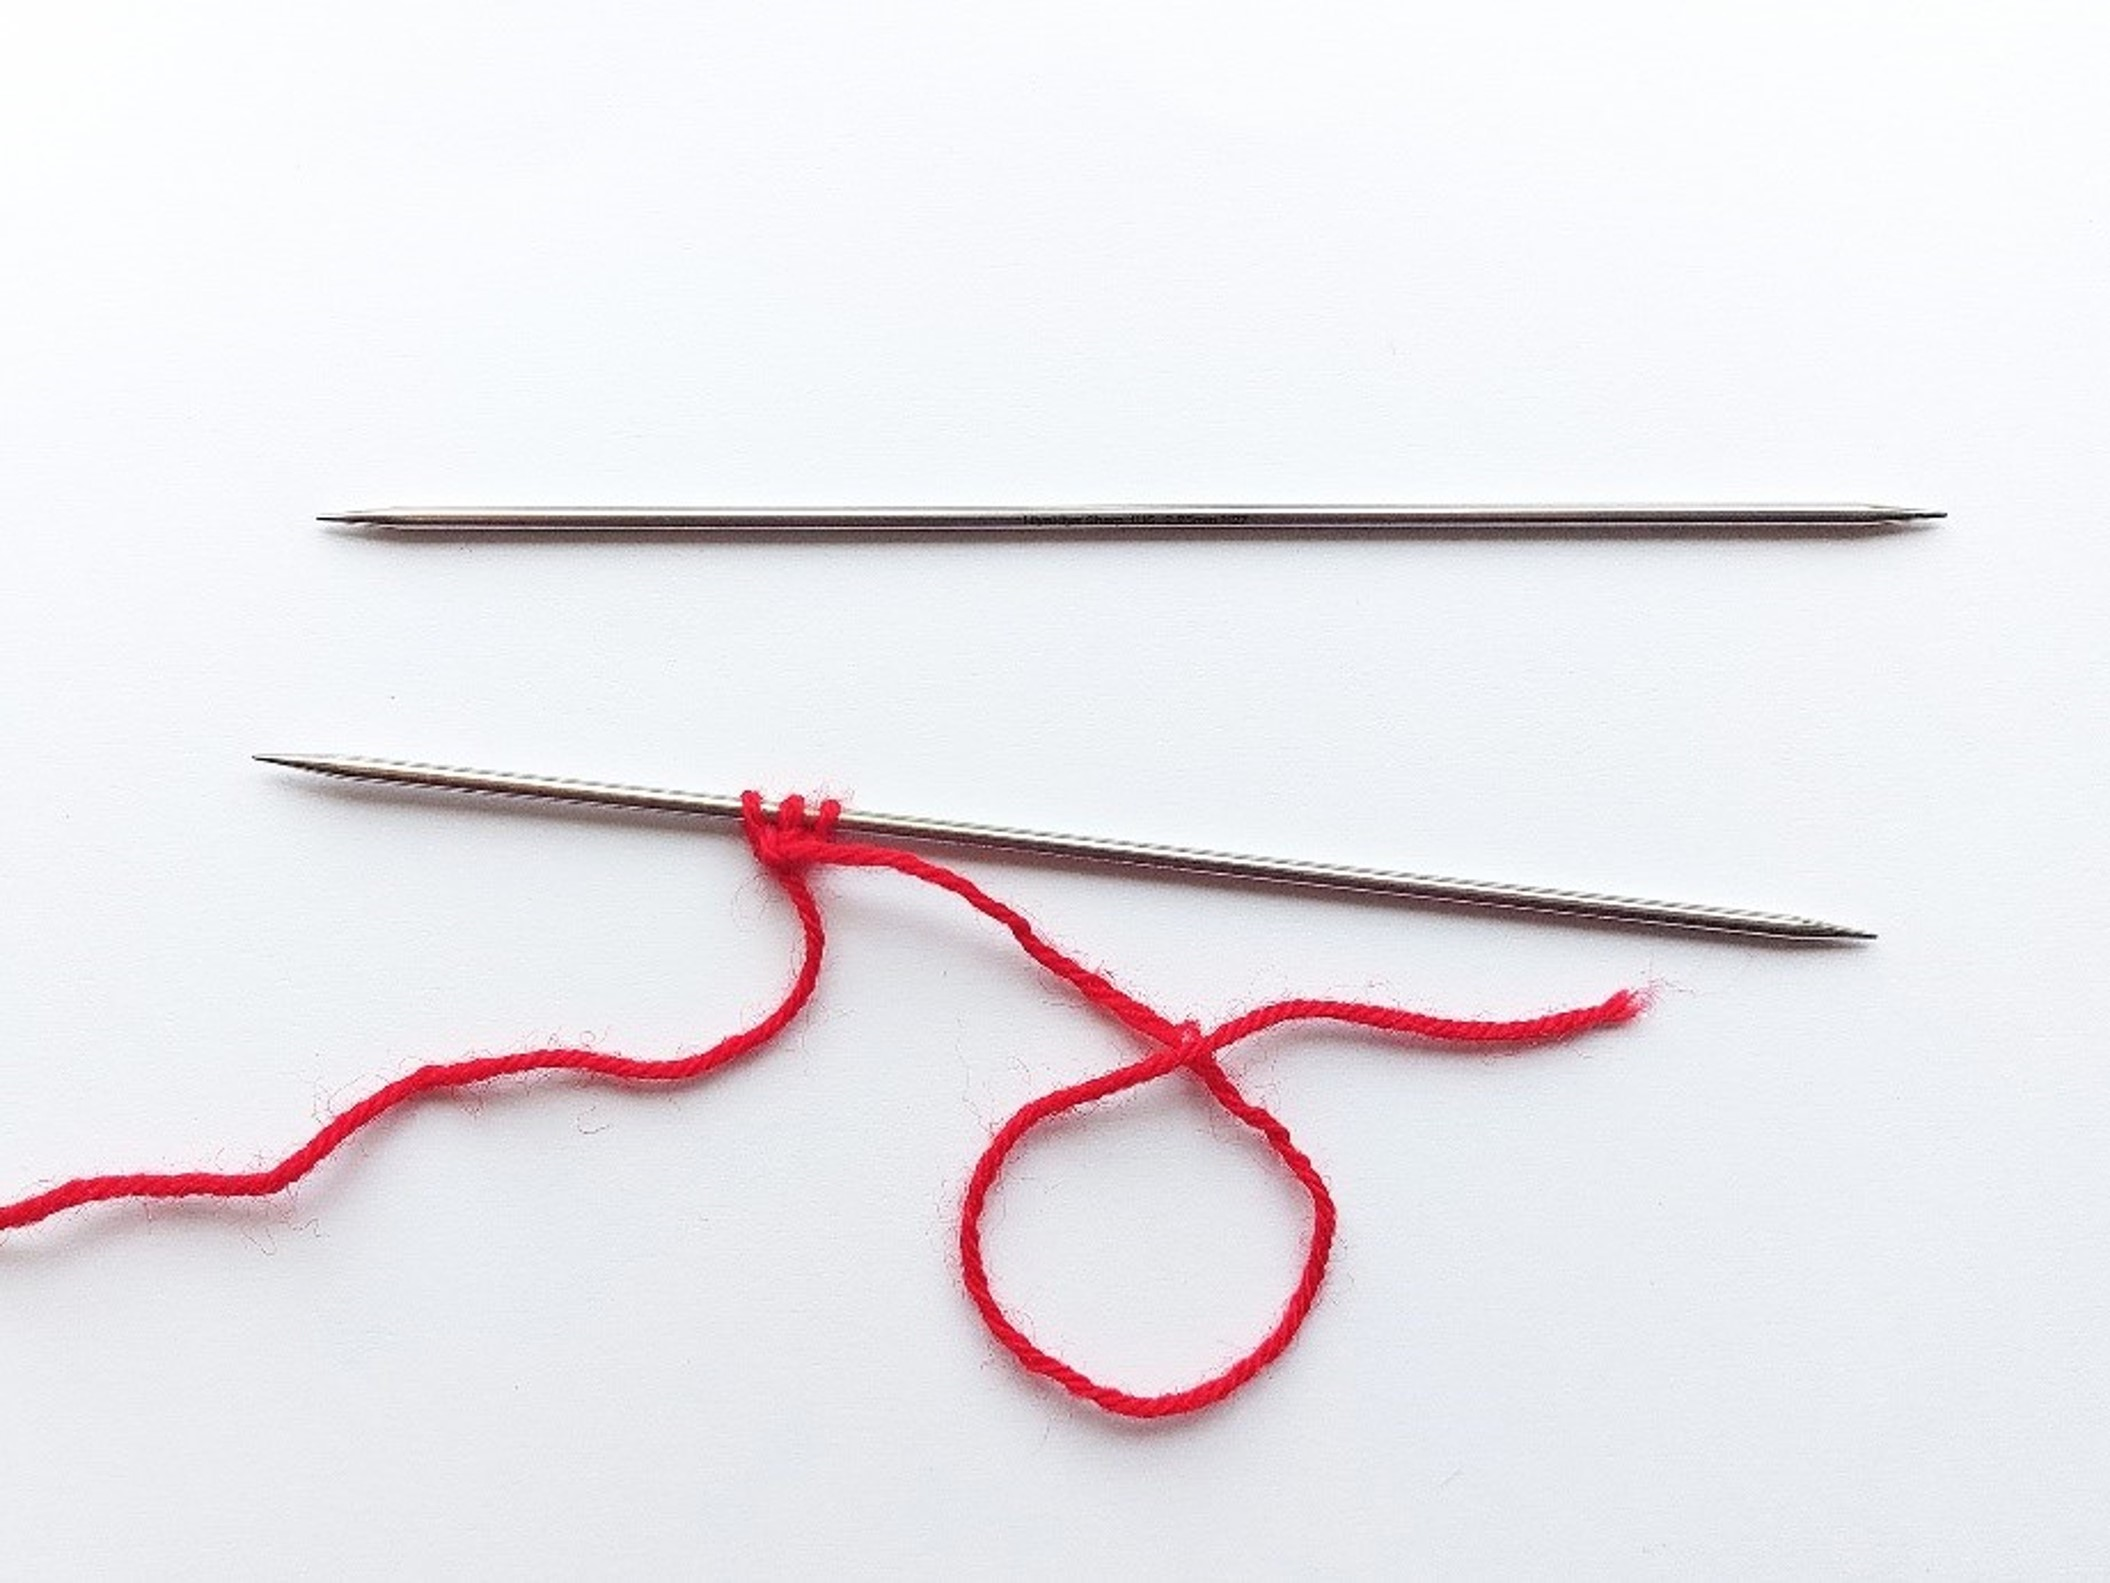
Step 3: Knit the 3 stitches.
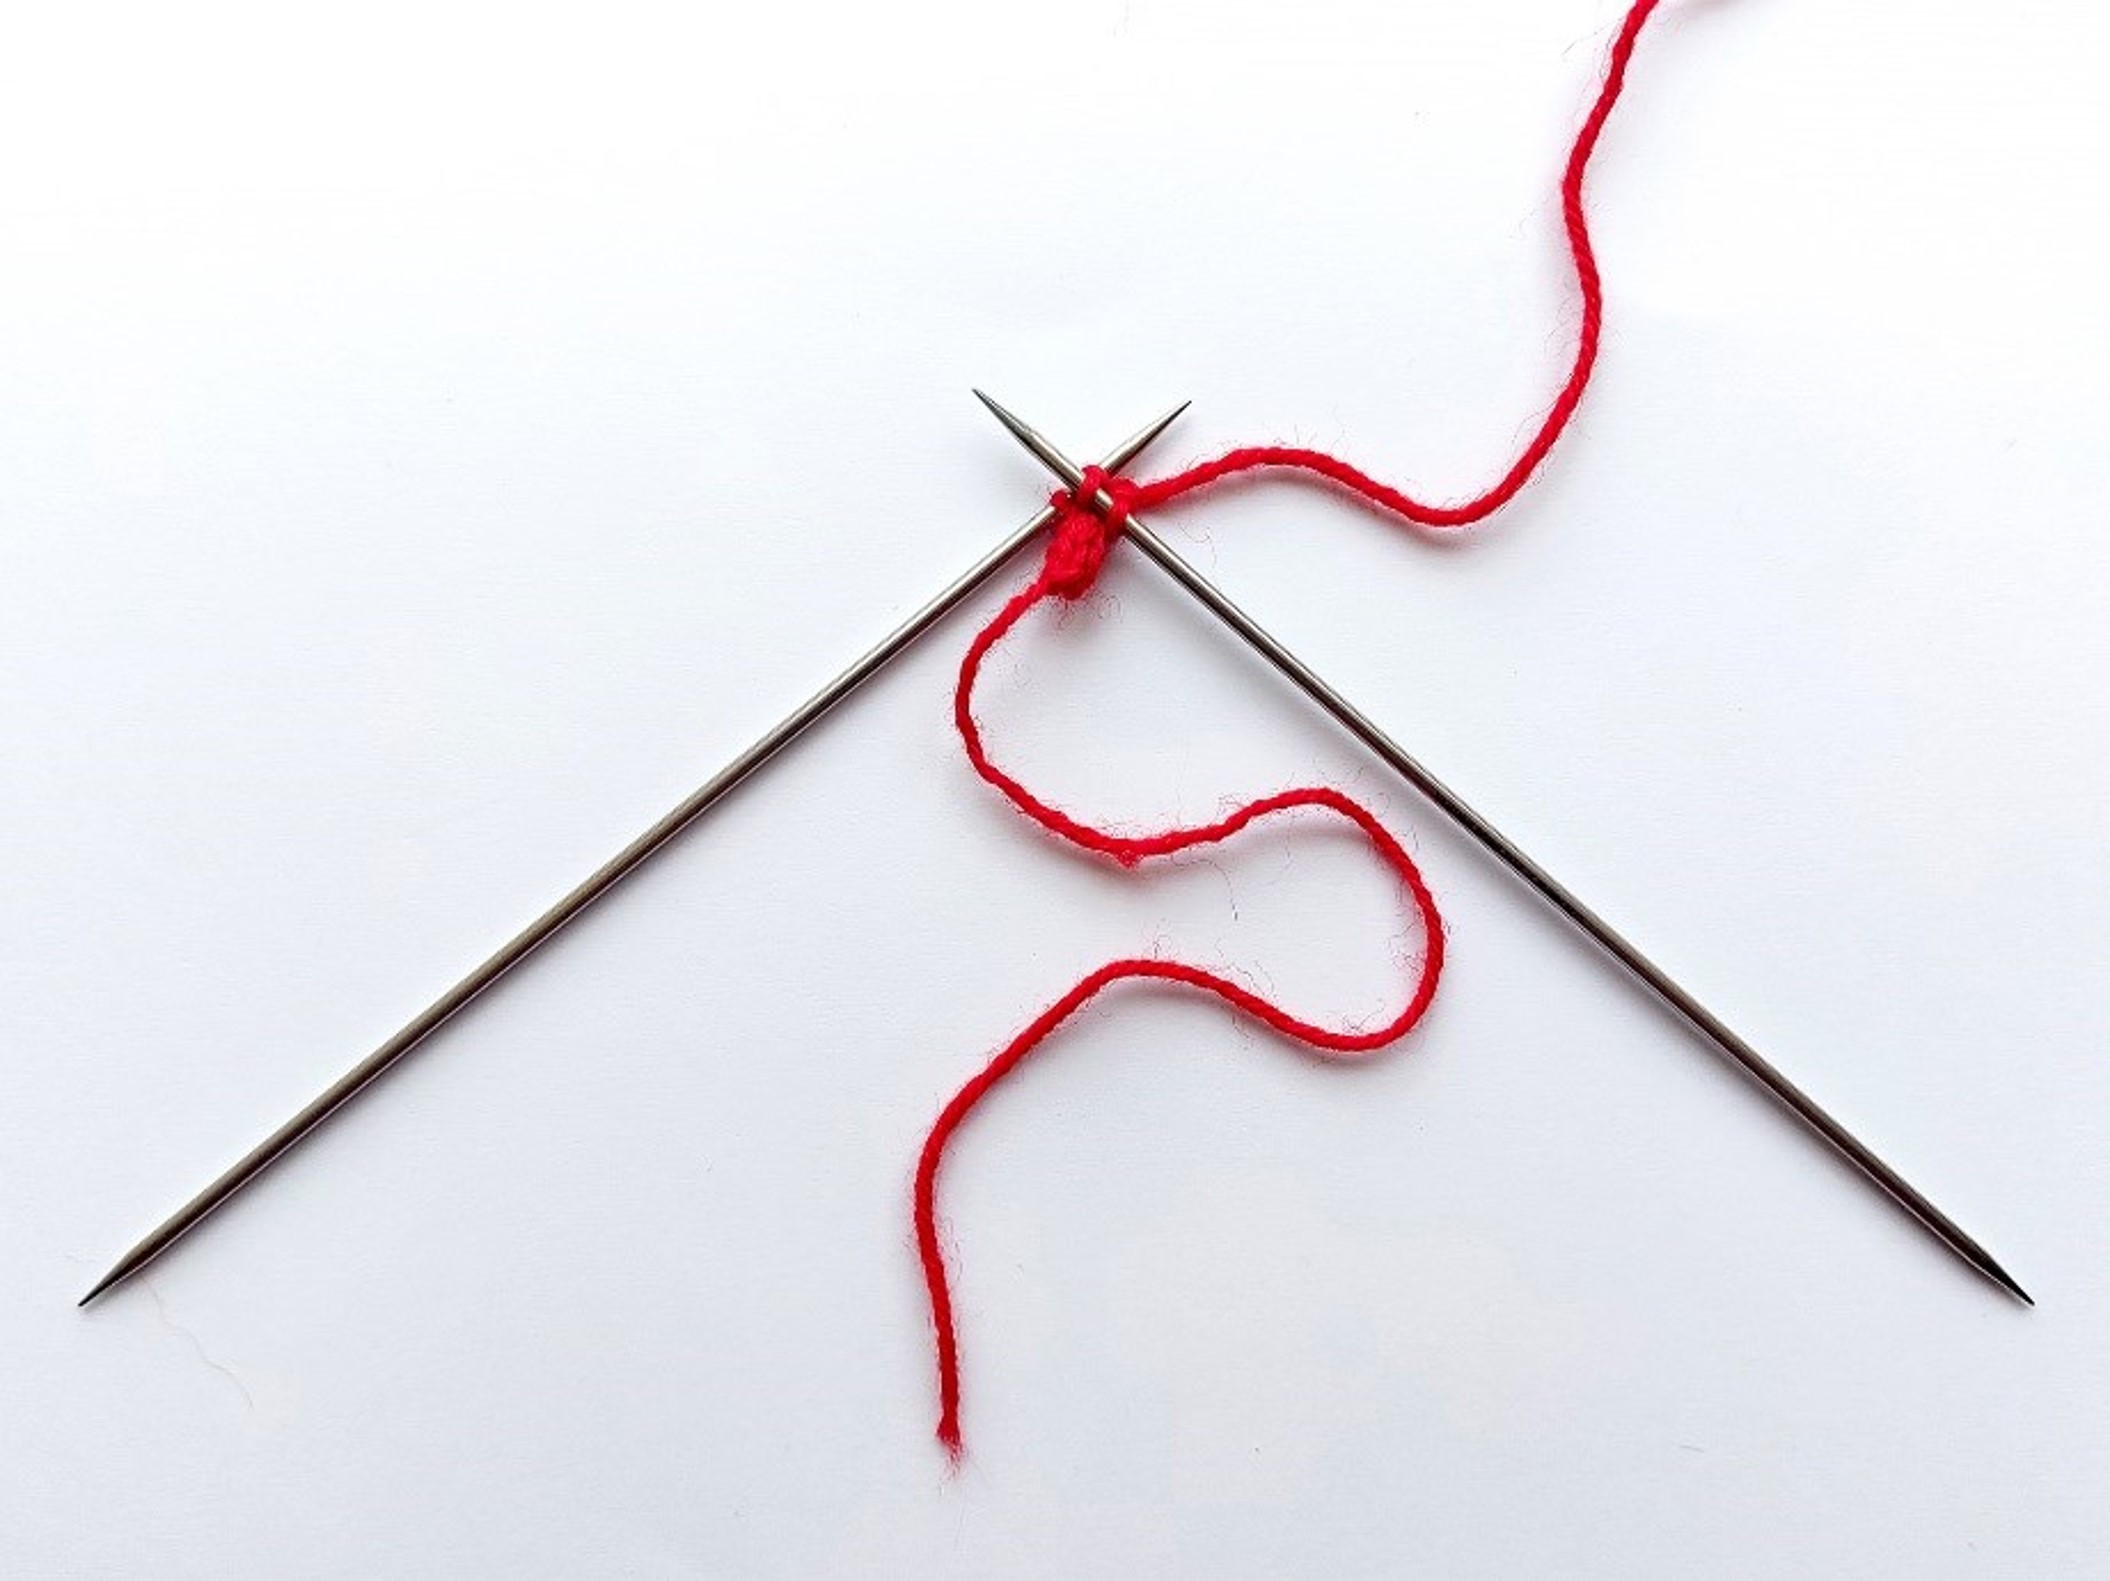
Step 4: Now this is where things differ depending on the needle type you are using. Double Pointed Needles: simply slide the worked stitches from one side of the needle to the other, ready to work a right-side row again. Straight needles or long circular needles: Slip the stitches from the left needle, back onto the right needle, ready to start a right side row again.
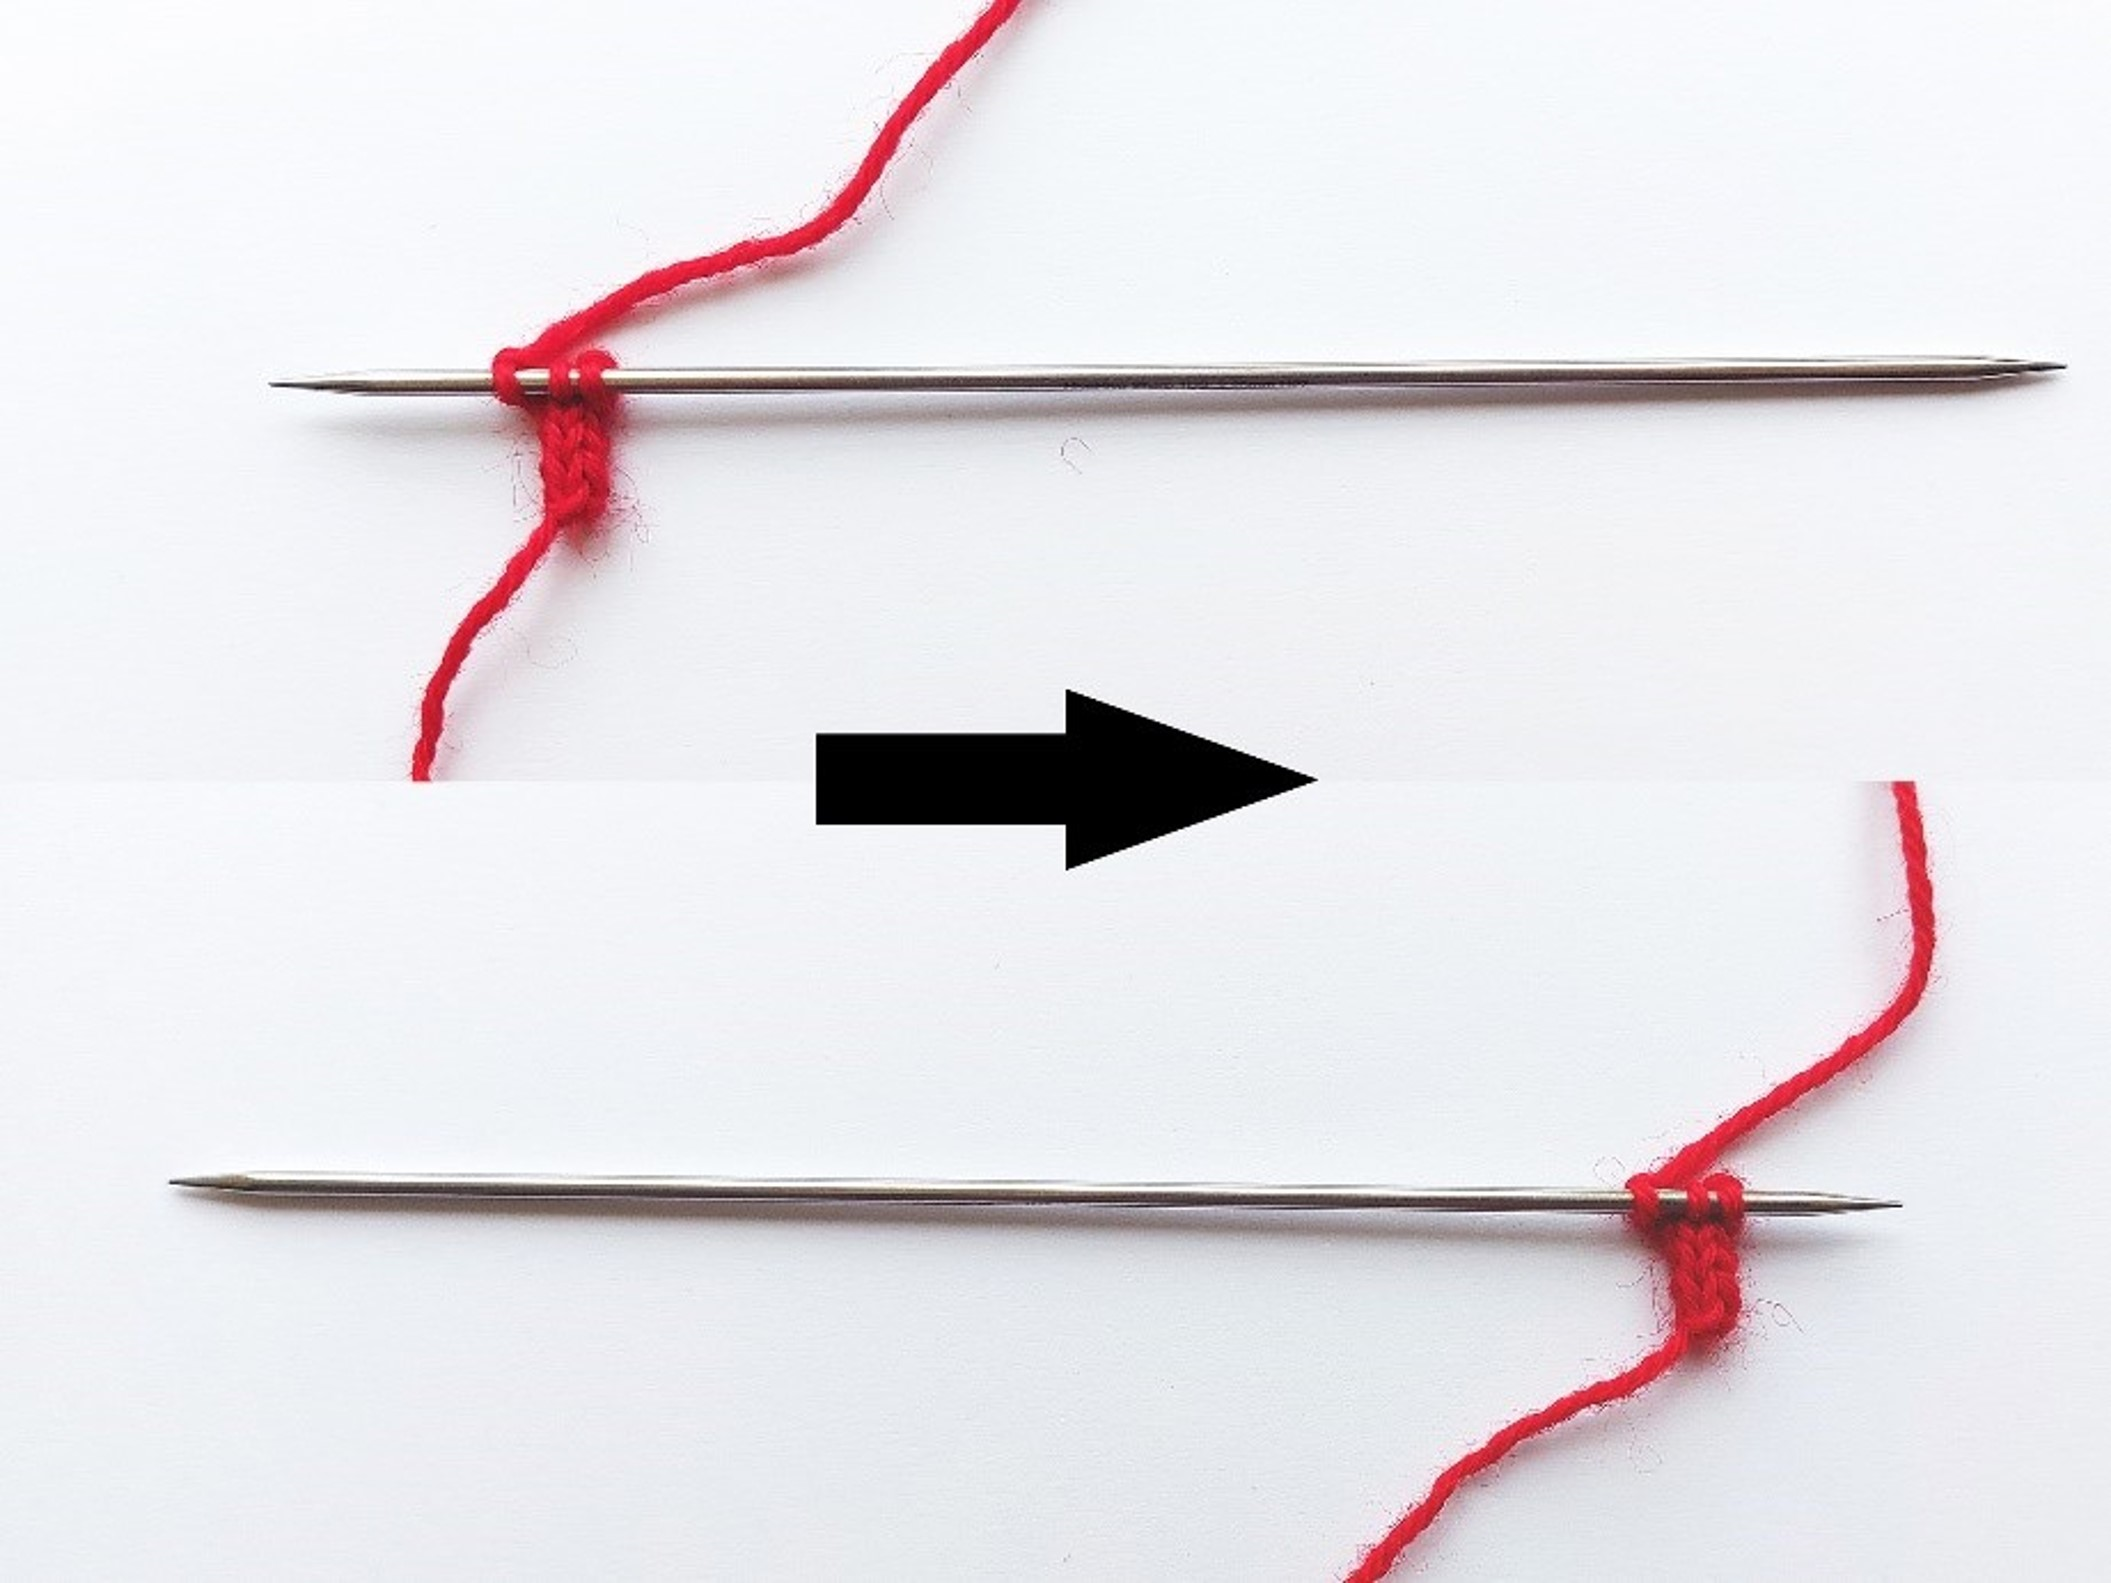
Step 5: Repeat step 3 and 4 until the I-cord reaches the length you require!
All you then need to do is knit all three stitches together, break the yarn and pull through the last stitch to secure the end.
That’s all there is to it! If you haven’t yet come across a pattern using this technique and fancy giving it a go, why not check out the Little Christmas Stocking Set as pictured above, or if you wish to level up your I-cord skills one further, the Pull On Vest pattern uses an ‘applied’ I-cord to finish the top shoulder finishings.