How to Knit Magic Loop
If you have never heard of the Magic Loop method to knit in the round then you absolutely have to read this blog! The Magic Loop method gives knitters the means to be able to knit in the round with a circular needle that is much longer than the circumference they are knitting. This is super helpful in many instances, but particularly for those who don’t yet own a plethora of knitting needles in an abundance of lengths and sizes. For example, if your first project is a jumper that needs a 80+cm length cable to knit the body in the round, that same needle may be used with the Magic Loop to knit the sleeve which has a much smaller circumference. Often double pointed needles (or DPN’s for short) are recommended in patterns for smaller circumferences and some knitters really enjoy this method of knitting, however others find wrangling 5 needles at a time a bit of a chore which is where Magic Loop comes in to save the day.
Putting it simply, with Magic Loop, the stitches in the round split into two, half sit on the needle to be worked whilst the other half are held on a length of cable, and this is how the small circumference is maintained on a long needle.
Lets break it down and show you how it’s done!
Step 1:
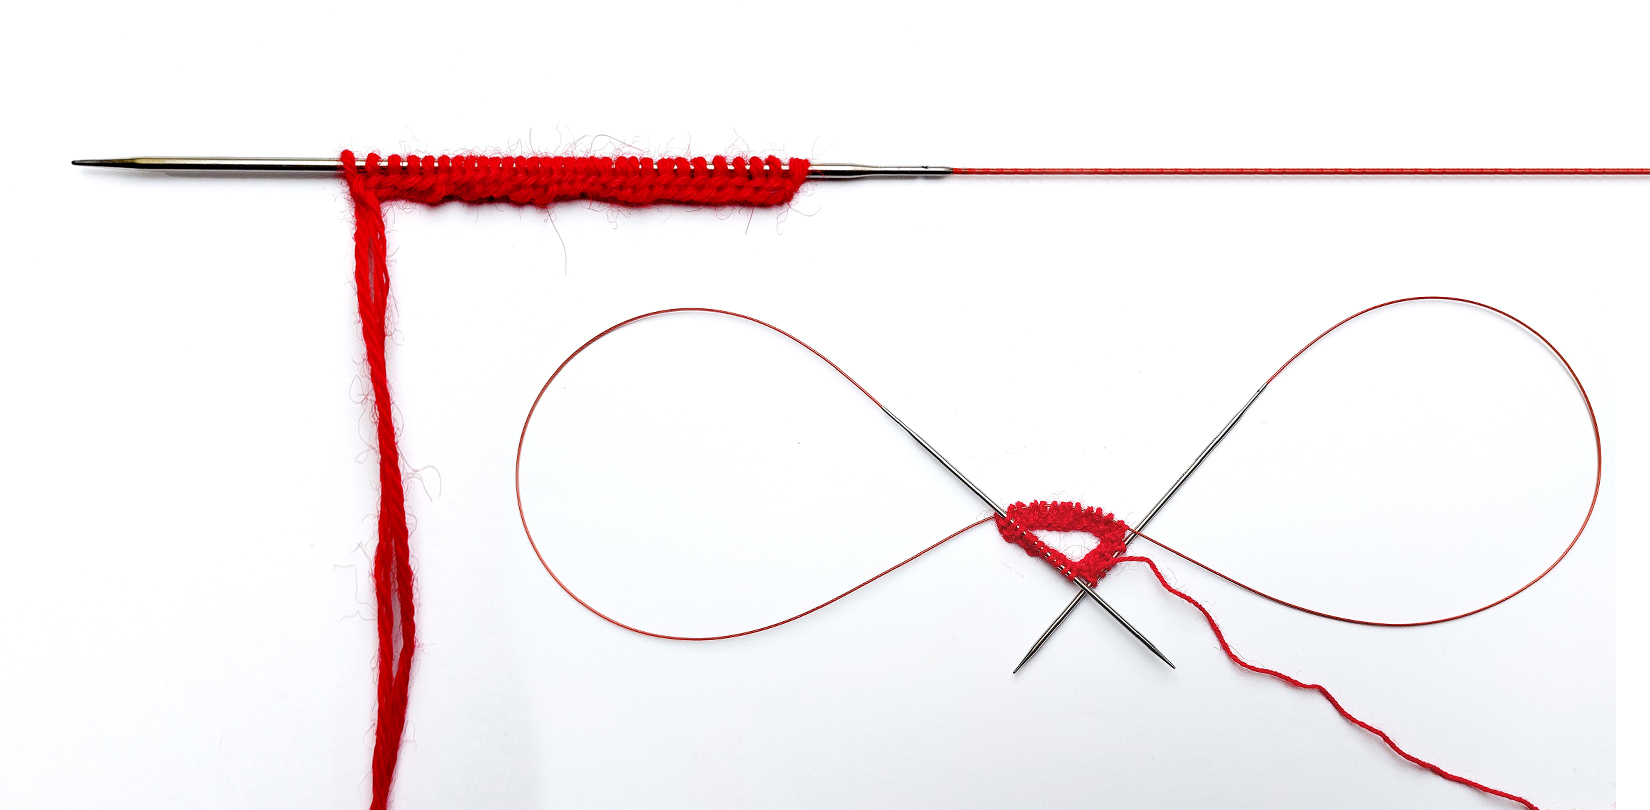
Cast on the required number of stitches onto the long circular needle you intend to use.
The image shows a long tail cast on but you can choose whichever cast on method works best for you – though it is helpful to have stitches that are already anchored so the backwards loop method may not be the best choice here.
The length of cable really depends on your preference and the circumference of the project you are knitting. We would generally recommend that it’s safer to go longer if you are new to the technique, you need a decent length of cord either side of the knitting so that you have good movement. Anything from an 80cm+ is a good place to start.
Step 2:
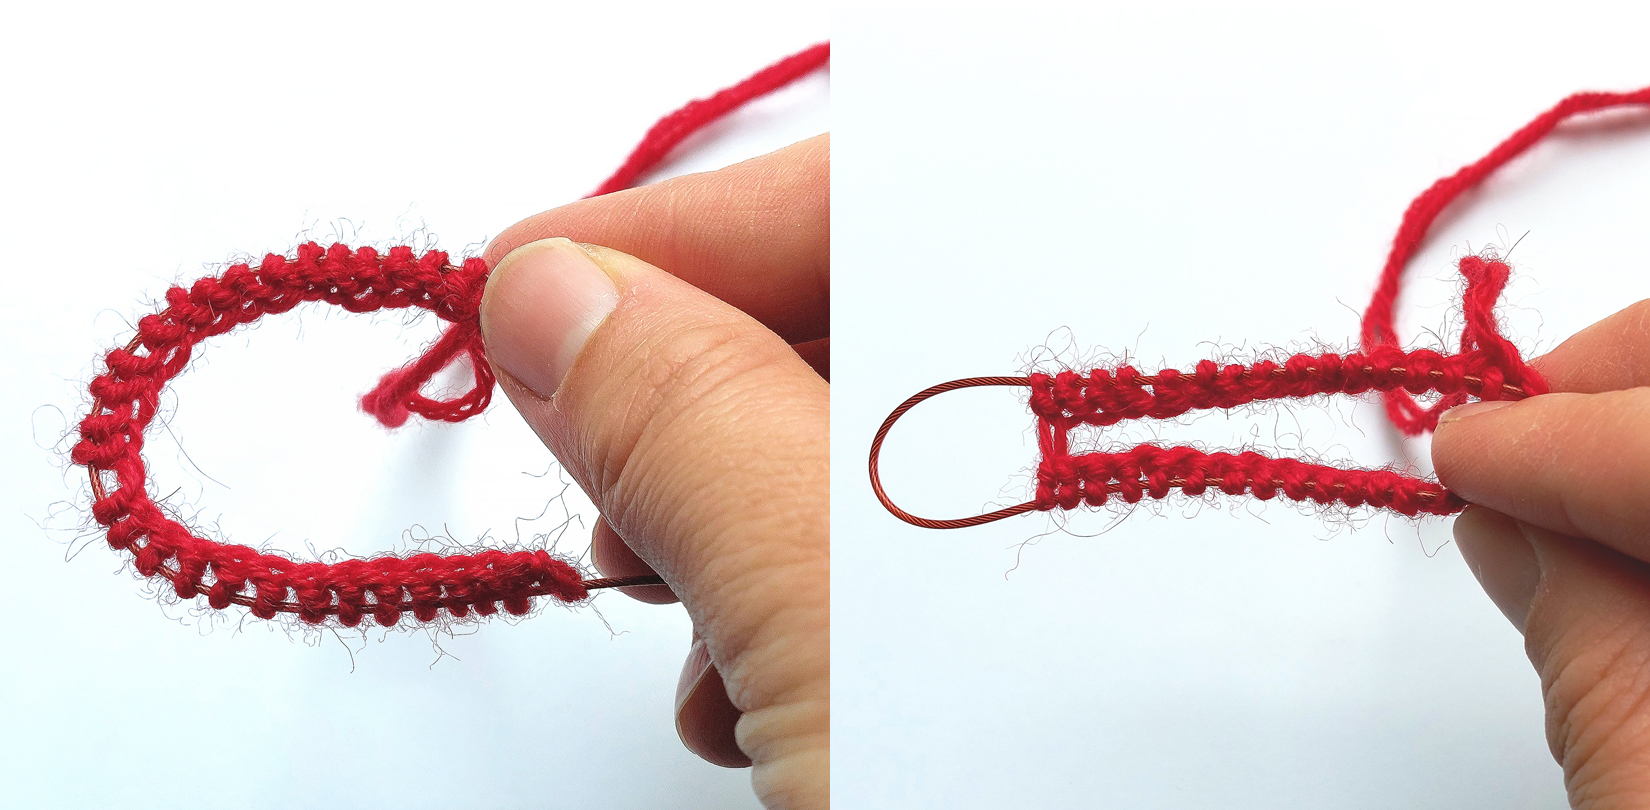
Now you have your stitches we need to set up for working in the round.
Slide the stitches onto the cable and gentle fold the cable in half, making sure that the yarn length that is attached to your ball is at the back.
Pull the cable through the halfway point of the stitches to split them.
Roughly (or exactly, if you like to be specific!) half of the stitches should sit on the front loop of cable and the other half on the back loop of cable. Continue to pull the cable through and bring the stitches to the front onto the needle. Leave the back stitches where they are but bring the other needle tip around ready to knit, ensuring that the yarn comes between the needles and doesn’t get trapped by the cable. Before moving on, make sure that the stitches are not twisted on the cable. If you start knitting with a twist in the cast on you will have to start all over again!
Step 3:
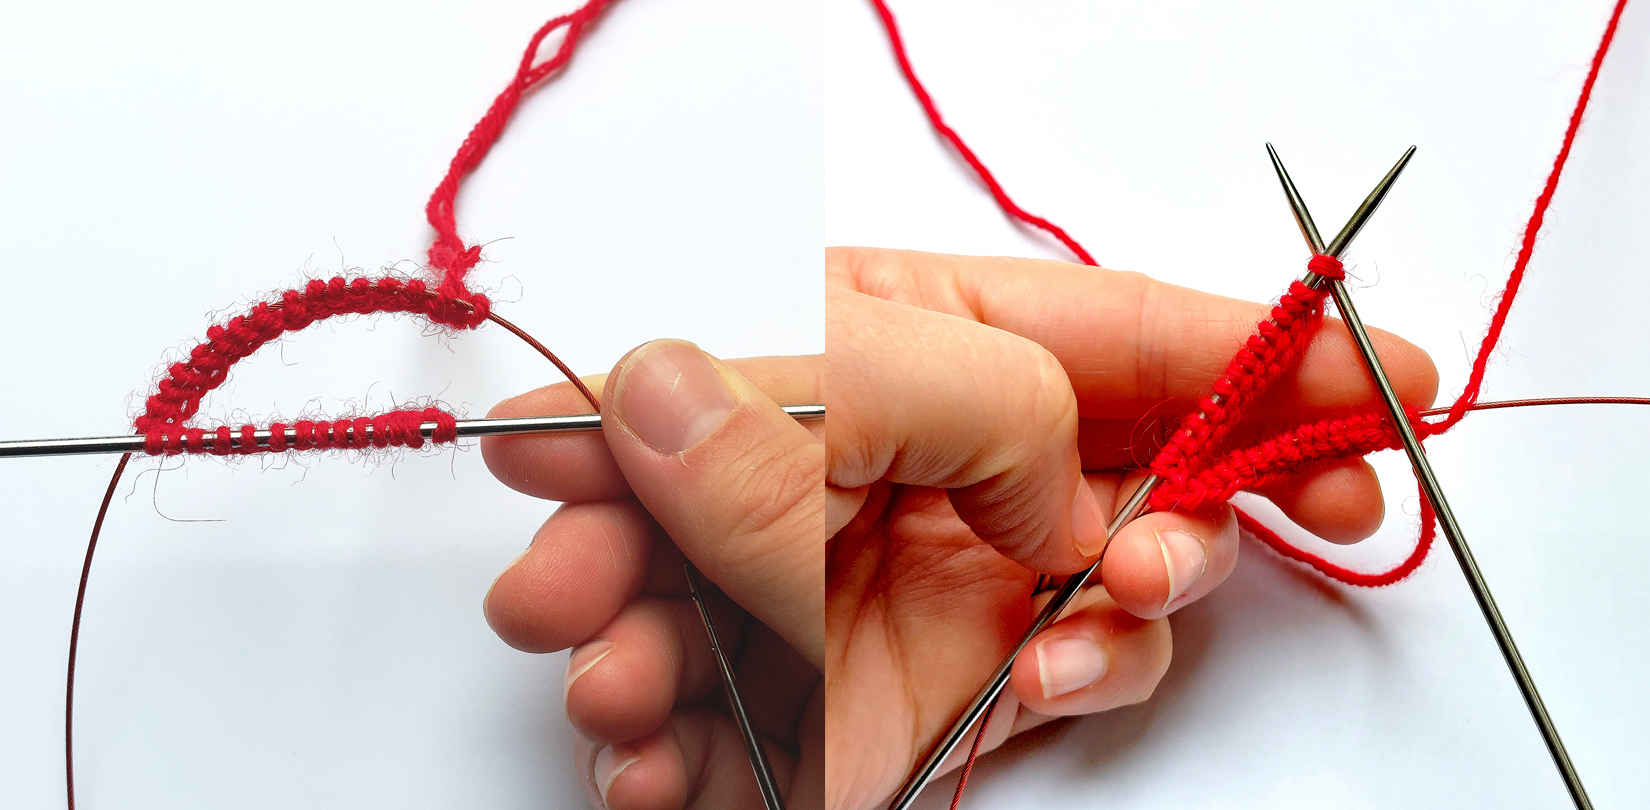
Start knitting!
From this position, take the working yarn and knit across the front stitches. When you reach the end of the front set of stitches, turn to that the stitches on the cable are now at the front.
Step 4:
Reposition the needle to knit again! Move the stitches now at the back, off of the needle and onto the cable. Pull the cable through the stitches now at the front to bring them onto the needle. Bring the free needle around to knit the front stitches as you would have done before.
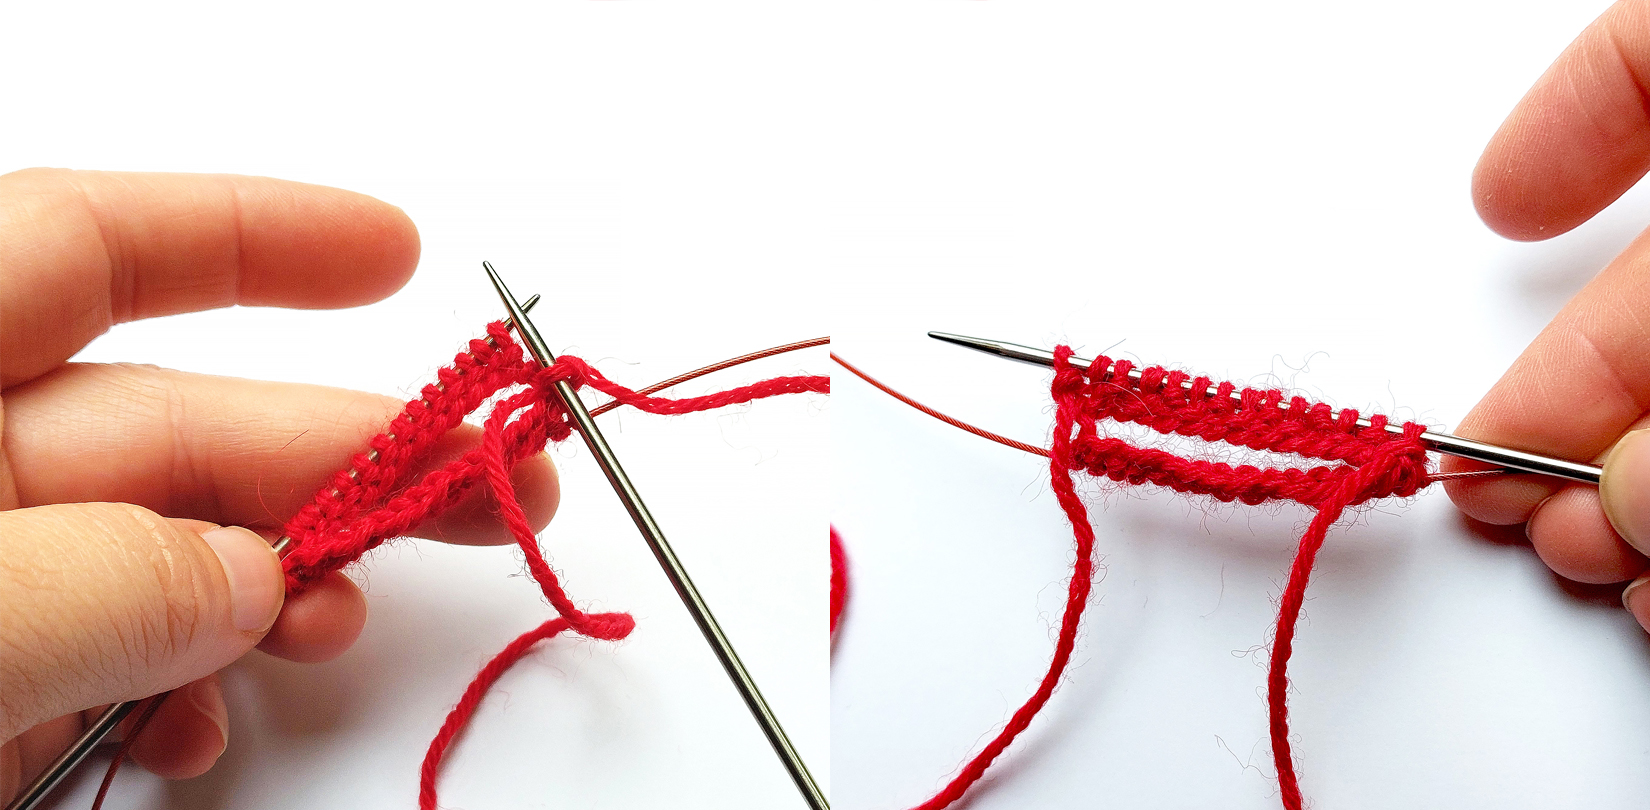
And that’s it; every time you reach the end of the stitches on the working needle, turn your work and reposition so that you can work again!
So there you have it, now you can work small circumferences on a long circular needle!