How to Knit Socks
Socks may look like a daunting project to take on, but trust us, they are a very achievable project for a beginner who is looking to level up their knitting knowledge in preparation for bigger things. All those stitches may appear fiddly, not to mention that heel! But put very simply socks are predominantly made up of a load of knit and purl stitches, mixed in with some simple decreases and a small amount of picking up stitches along a vertical edge. Socks provide a great learning opportunity for understanding how simple techniques can be used effectively to shape and contour fabric. They are sure to boost your confidence in holding and using different types of knitting needles, help you gain a greater understanding on the various types of knitting needles and their uses all whilst mastering the wonder skill of knitting in the round!
Basic Sock Construction
Believe it or not, there any many ways to knit a sock but they all should share the main components:
Cuff – the top (usually, but not always, ribbed) part of the sock.
Leg – the main part of the sock, after the rib but before the heel. The leg length of a sock will vary depending on the type of sock you are knitting – knew high socks, for example, will go on for days until you reach to heel whereas in a pair of ‘shortie’ socks, the leg section may only be a couple of rounds before the heel.
Heel – The part of the sock that is shaped to make the sock fit the foot. There are several ways to knit a heel but generally they all use the same basic principles of decreasing and increasing stitches at a certain point to create the shaping required. Many types of heels use short rows too!
Foot – the main part of the sock after the heel but before the toe. This part of the sock is where the length really matters in regards to knitting a sock that will fit your shoe size!
Toe – the portion of the sock which is shaped to fit over the toes.
Socks are most commonly knit either from the cuff down or the toe up. Very occasionally you may come across a ‘heel out’ pattern but that is a whole other level of fan dangled wizardry we can talk about another day!
Needles, needles, needles!
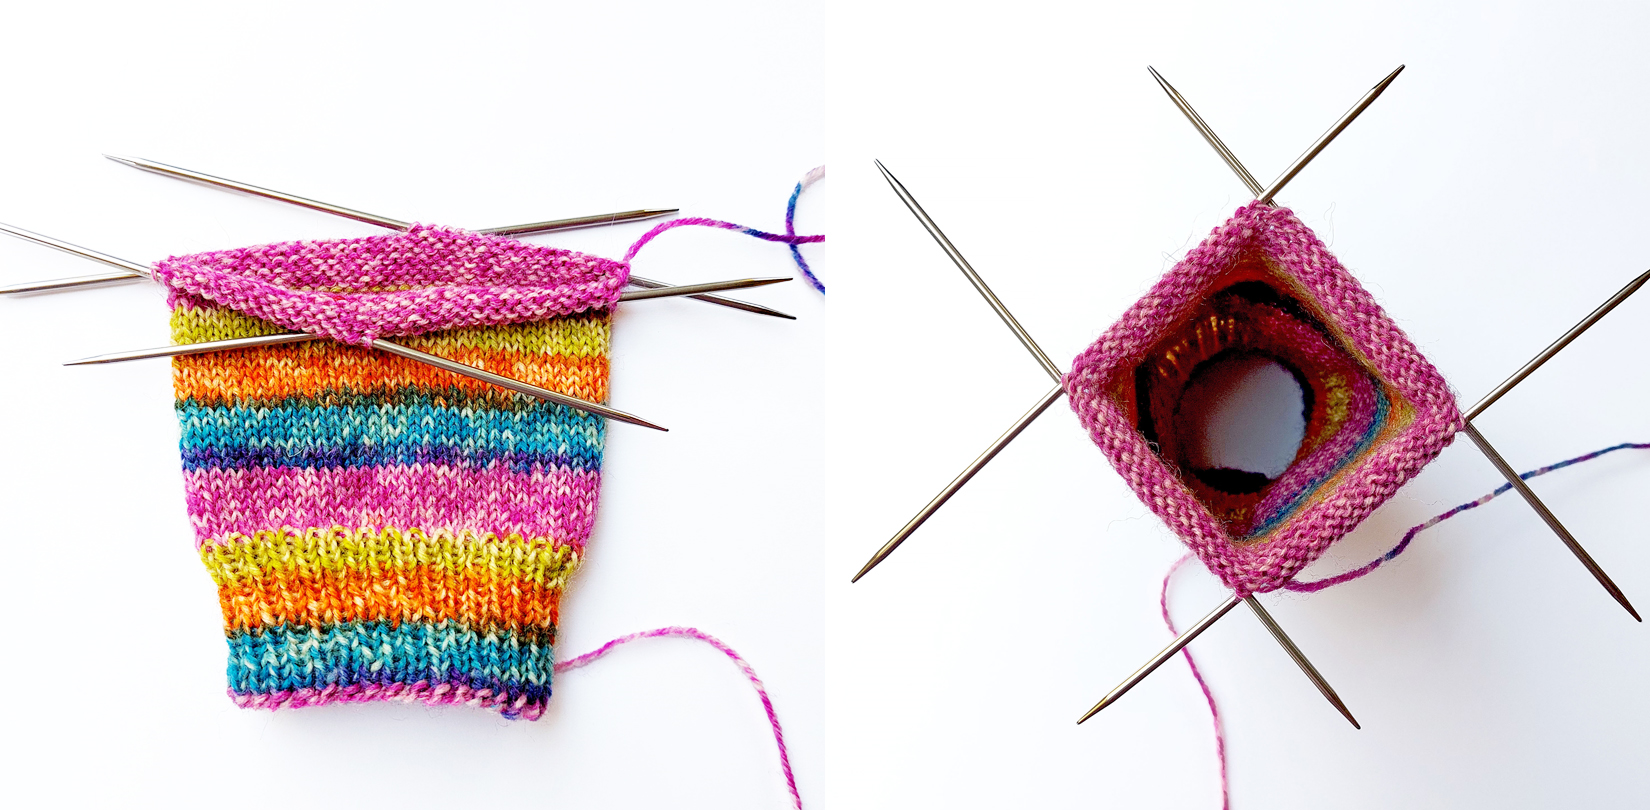
What type of needle is the best for knitting socks?! This entirely depends on what you get on with. Socks that are knit in the round are traditionally knit on Double Pointed Needles (or DPN’s). Double Pointed Needles come in a set of (usually) 5 needles that have a point on both ends rather than a ‘stopper’ on one end. This means they can be knit with from both sides. The purpose of this is so that stitches can be distributed evenly around the needles in order for them to be knit in the round.
As you can see here, the sock stitches are distributed evenly on 4 needles so that the circular shape is maintained. The 5th double pointed needle is used to knit the stitches onto. As you knit, the stitches are moved from one needle to the other, meaning that there should always be a spare needle to work with.
The main advantage of knitting socks on double pointed needles is that is feels the most similar to using normal, straight needles, as, you know, they are straight! However, it can feel like a bit of a skill to get used to holding and handling several needles at once and many people find this a bit fiddly.
Another way to knit socks in the round is by using a small or short circular needle. These are needles that are specifically designed to be used when knitting small circumferences in the round.
For many knitters, this makes for the most fluid experience for knitting socks because you can simply just knit round and round and round with no break (other than to maybe slip a marker) in the rhythm of knitting. However, there are some draw backs too. Firstly, another type of needle (such as double pointed needles) may still be required to work some sections such as the toe decreases and the heel. Some knitters have also noted that knitting small circumferences in the round, particularly with a tight gauge which you typically have with socks, can be taxing on the wrists and cause wrist pain. If you are intrigued by this technique don’t let this put you off though, not all knitters get pain so it really does depend on what works for you!
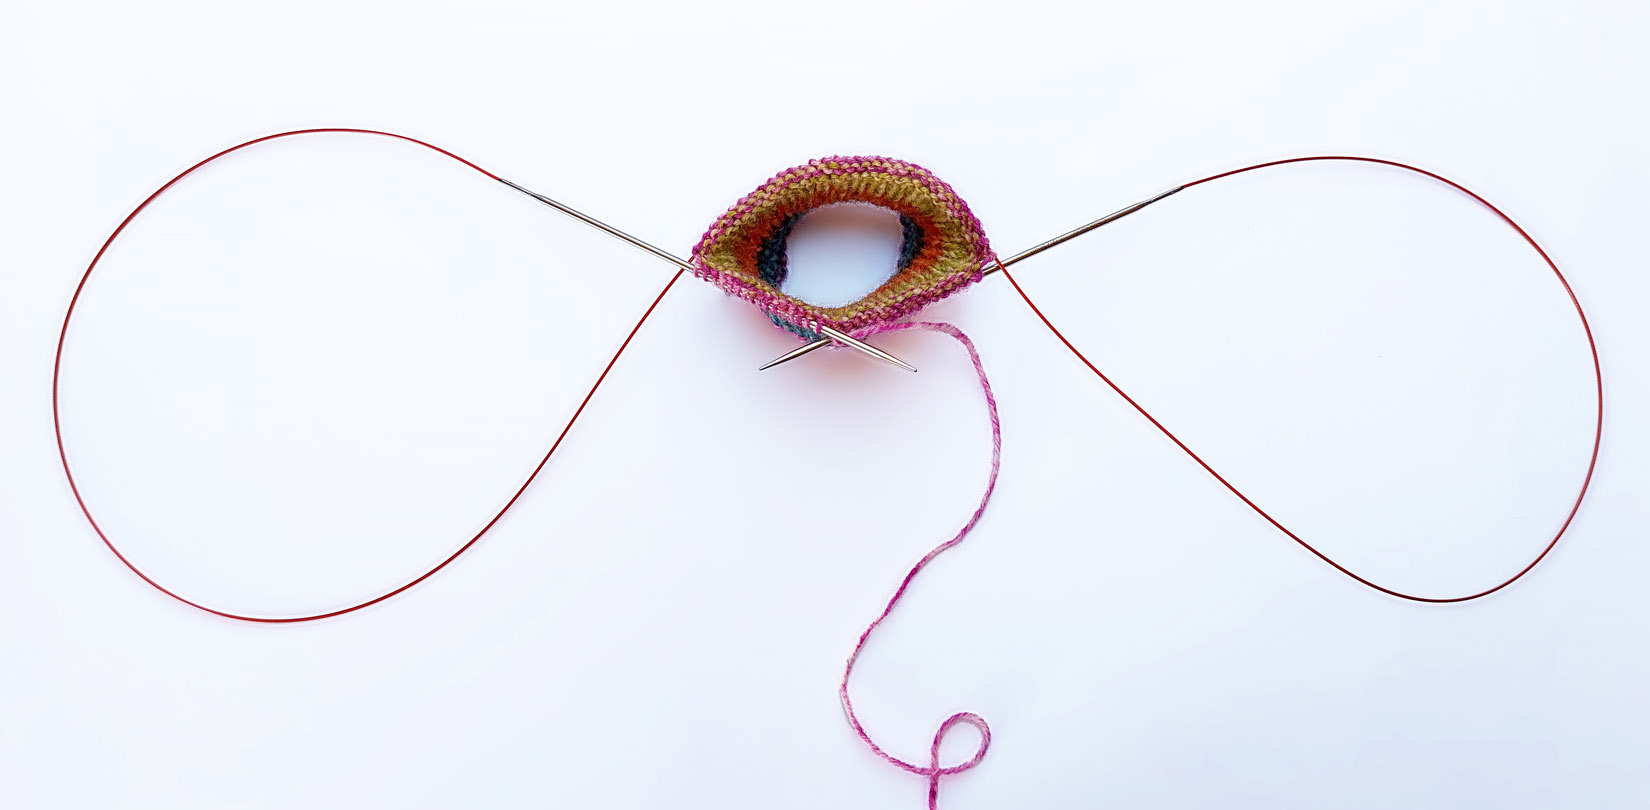
The final way to knit socks we will cover in this blog is using a long circular needle using the technique called ‘Magic Loop’. Magic loop is a technique whereby a single long circular needle can be used to knit small circumferences in the round.
This is achieved by pulling a length of cable through the halfway point of the stitches to create a loop. To begin with, one half of stitches will sit on one end of the circular needle and the other half of the stitches will sit on the other end of the circular needle. The back needle is then pulled through to create another loop when it is inserted into the stitch to knit. Having extra cable for half of the stitches to sit on whilst knitting the other half means that the small circumference can be maintained. Please see our blog ‘How to knit Magic Loop’ for full instruction.
Knitting socks using the Magic Loop methods incorporates the best of both worlds when comparing against using double pointed needles or a short circular needle. Magic Loop is generally easier to handle than double pointed needles but less stressful on the hands as you still benefit from having larger needles to hold. There is also the benefit that heels and toes can be worked using the same needles as any circumference of stitches can be knit in the round this way. The only disadvantages really is that every half round you have to manoeuvre the stitches again to work the next half. This can disrupt the knitting flow, particularly for speedy knitters. Occasionally there can also be gauge discrepancies where the cable and needles separate the stitches which results in a vertical line appearing in the fabric. This line usually blocks out and with practice you will learn to get the tension just right so it doesn’t happen at all!
Choosing yarn for socks
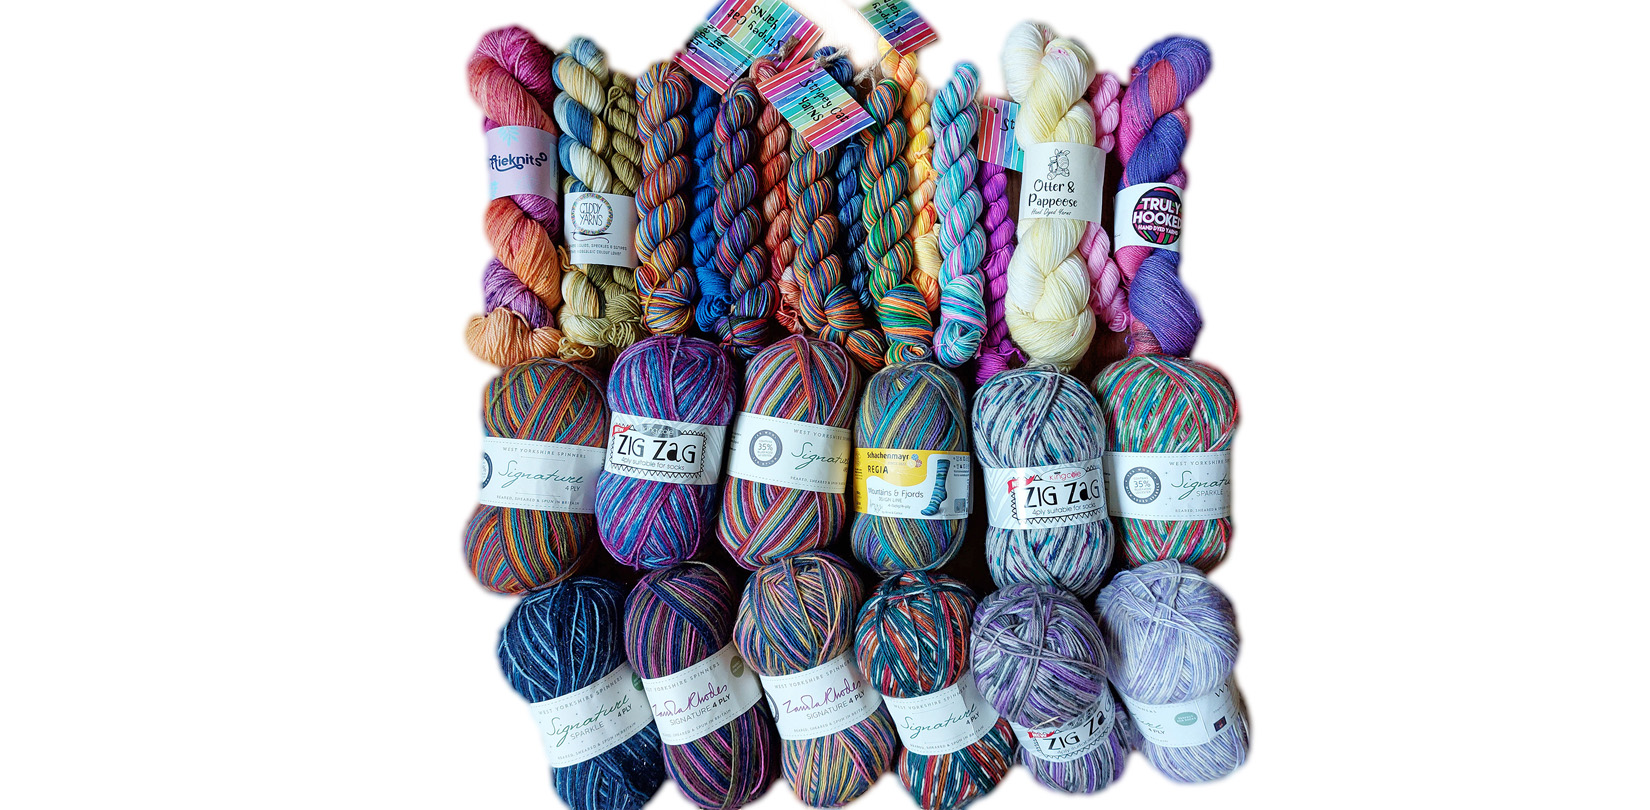
Choosing yarn for socks can be a tricky business. yarn needs to be practical and hard wearing but also soft and comforting as it inevitably sits so close to your bare skin. No one wants itchy feet! Luckily, knitting socks is a popular hobby and therefor there are PLENTY of choices out there, probably too many!
Fibre composition for socks
The ‘best’ yarn for knitting socks definitely comes down to personal preference as there are so many to choose from. Arguably, the ‘best’ would be a wool based yarn with reinforcement such as Nylon. Wool is a wonderfully versatile fibre, it has great thermoregulatory properties which means that is can keep you lovely and work in winter but is also breathable and cool in the summer. Wool is a great option for socks because it can also absorb up to 30% of its own weight in moisture before it starts to feel wet! Sweaty feeling feet, no more! Oh, and on this note, wool also has antibacterial properties too – win, win!
Although wool alone as a great option for socks, it may not be sturdy enough to withstand the natural wear and tear that socks are exposed to, particularly when worn in shoes. The high friction areas such as the sole or heel could start to wear thin pretty quickly. Therefore, it is sensible to add a bit of reinforcement. You can buy thread reinforcement to hold with your yarn when knitting the critical areas but if this sounds like too much faff then most sock yarns come with reinforcement already added. A wool/nylon base is by far the most readily available sock yarn, certainly from some of the major commercial yarn producers such as West Yorkshire Spinners, Regia or King Cole, to name a few. Commercial sock yarns have an added benefit of being very affordable when you look at the price per 100g. Depending on the size of feet you are knitting for, you can definitely get two pairs of socks out of 1 ball of yarn! They also come is a huge variety of colours and variations, from single solid colours to crazy neon stripes, and everything in between.
Hand dyed yarns also stand very strong in the sock yarn market. Although more expensive than commercial sock yarns, the benefits of using hand dyed yarns are obvious. Generally (but not always), they are made from Superwash Merino or Blue Faced Leicester wools which makes for a much softer feeling yarn and can be more comfortable against the skin. There are no limits on the colours or variations available and there is always the added nicety that you are supporting a small business doing what they love.
If you would prefer to stay away from wool or nylon, whether for sensitivity reasons or moral reasons, there other options such as cotton or bamboo are a good option, though it’s worth remembering that plant-based yarns don’t have the same elasticity as wool so you may end up with a baggy, misshapen sock. We would recommend staying away from using acrylic for socks simply because the plastic content means that it doesn’t handle moisture very well or breathe in the same way as wool. This will result in pretty uncomfortable feet!
Yarn weights suitable for socks
Socks can be made in any weight yarn you wish. However, the weight of yarn you choose will decide how warm the socks are and ultimately, their use. For example, a super chunky yarn would be an excellent choice for comfy bed socks or slippers, but it would be rather difficult to squeeze them into trainers if you were to go out wearing them!
Most commonly, socks to be worn with shoes are knit using a 4ply/fingering weight yarn. A yarn with around 400-425m per 100g would be perfect, although sport or DK weight yarns are a popular choice too. The most important thing is to ensure you match the weight of yarn suggested by the pattern and that your gauge matches, otherwise you run the risk of a sock that doesn’t fit!
Self-striping yarns VS. striping using separate yarns
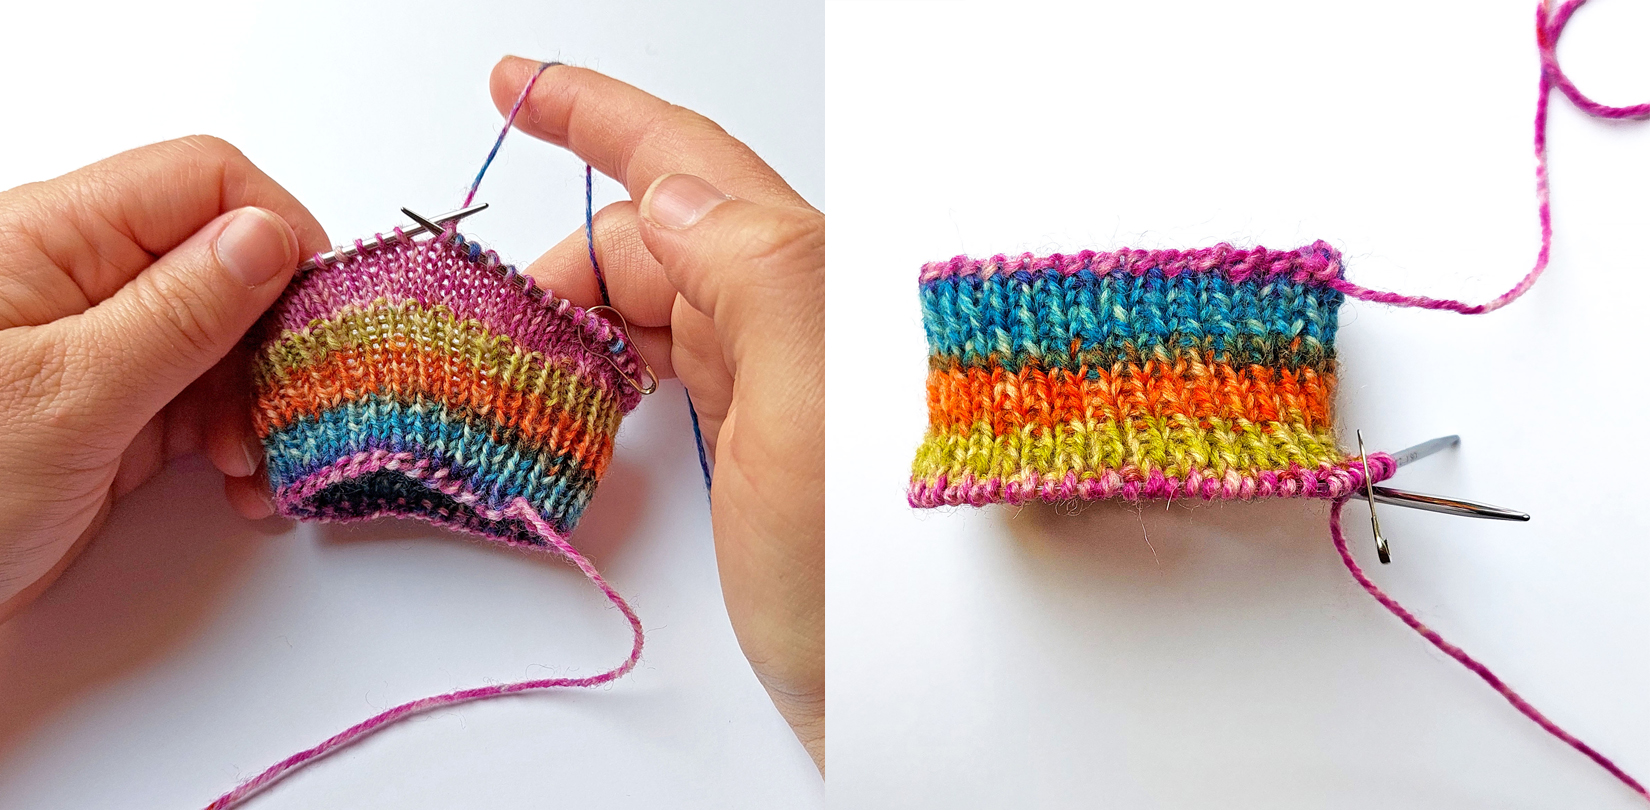
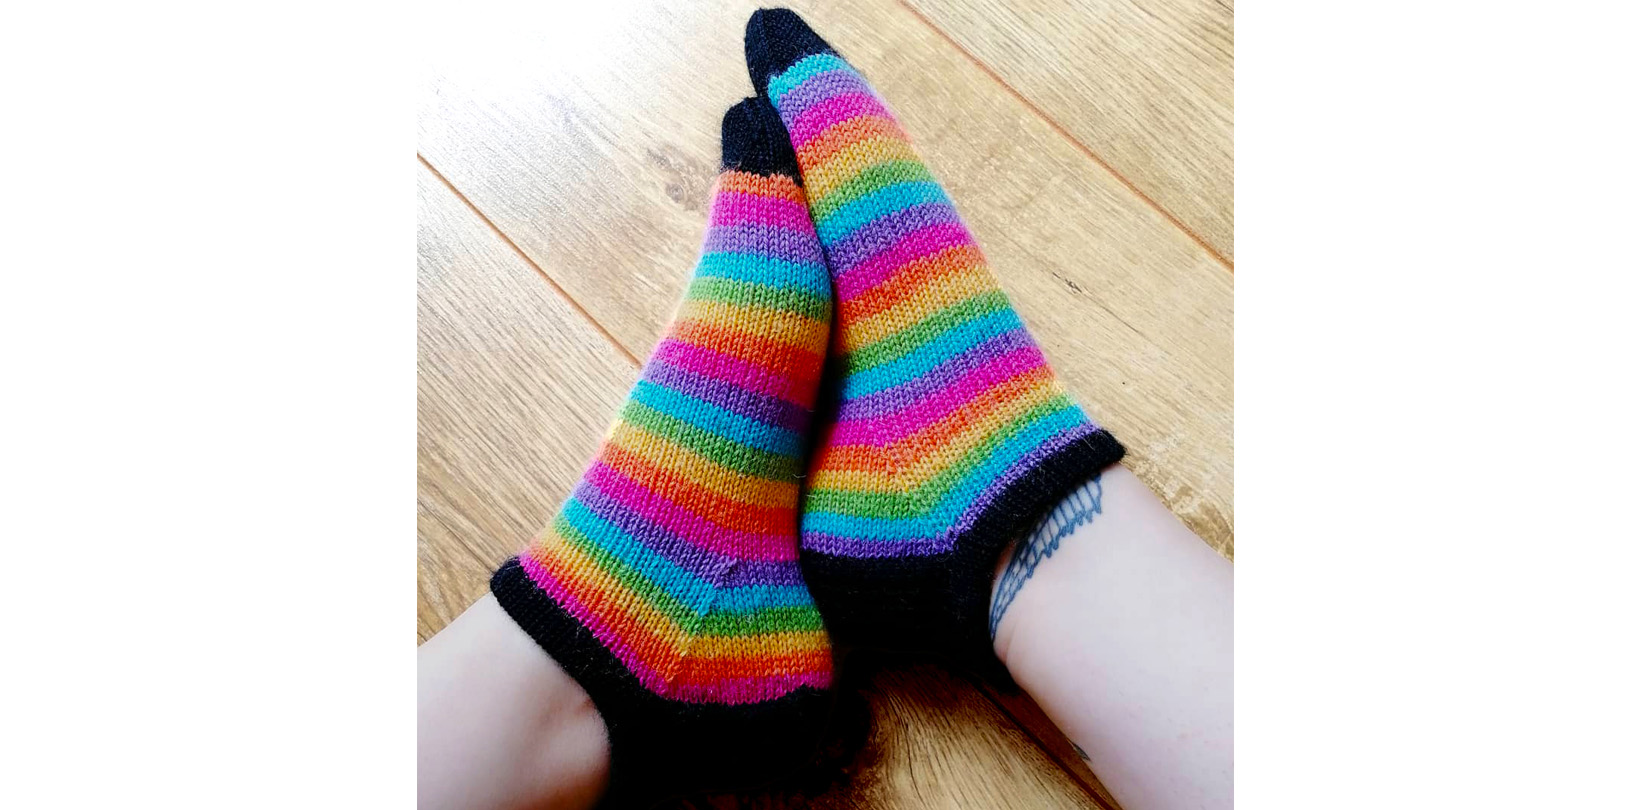
The Basic Children's Socks and Basic Adult's Socks patterns both use a standard 4ply commercial sock yarn. As you can see, both of the samples are knit in stripy yarns. The Children's socks use 3 different solid colour yarns whereas the adults socks use a single ball of self-striping yarn.
There are pros and cons of both ways of creating stripes. It may be annoying to have to buy multiple balls of yarn only to use a small amount of each when striping colours yourself, though, with a bit of math, you can evenly space the stripes exactly how you want them. If you decide to stripe your socks this way, you will need to work how many rounds are needed to create each of the components in the sock and divide by the amount of stripes you wish to create. Smart Knit It® is super handy when it comes to working out the total amount of rows as it literally tells you! Handy huh? Just remember, with using separate balls of yarn for each stripe, you will inevitably have more ends to weave in so have your darning needle at the ready!
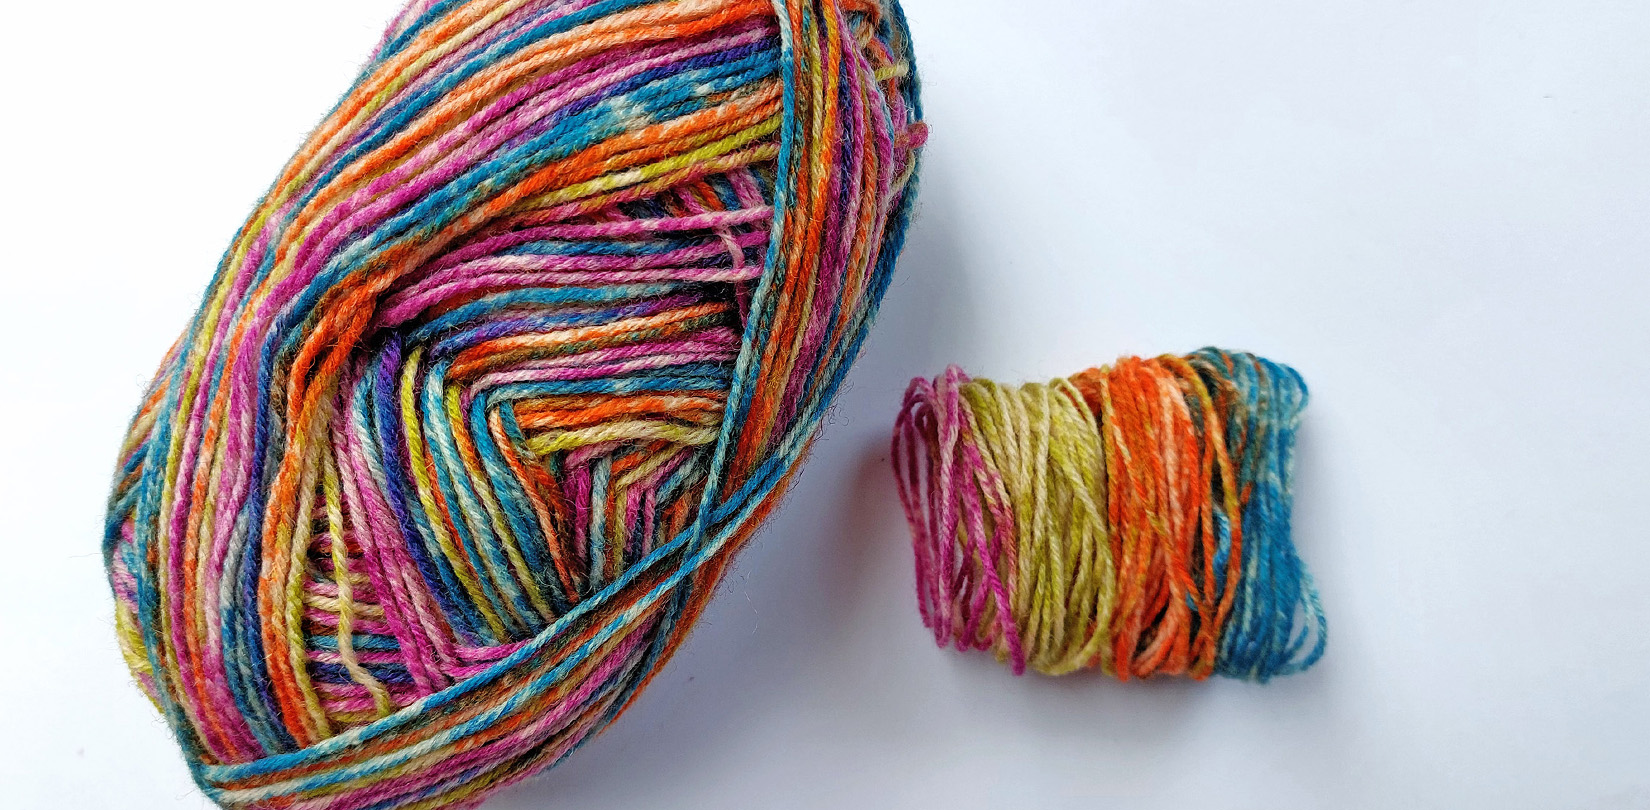
If you would rather just knit and the stripes magically appear then a self-striping yarn is definitely the way forward. Literally knit and watch the pattern appear! The downside to this though is that you have no control over how the stripes will look. The thickness of the stripes will depend on the finished circumference of the sock; the more stitches in the round the thinner the stripe, less stitches, the thicker the stripe. Also, if you like your socks to be identical, you will need to expect to waste a little bit of yarn in the middle of your ball in order to start the stripe in the same place.
Here a few handy tricks you need to know in order achieve perfectly matching socks:
1. Start both socks at the same point.
Although it is not completely fool proof, most self-striping yarns have a certain length of yarn allocated to each colour or stripe. This means that if you cast on the socks at exactly the same point in the colour repeat, both socks should come out the same every time. Providing you work exactly the same number of rows and that your tension doesn’t change drastically from one sock to the other.
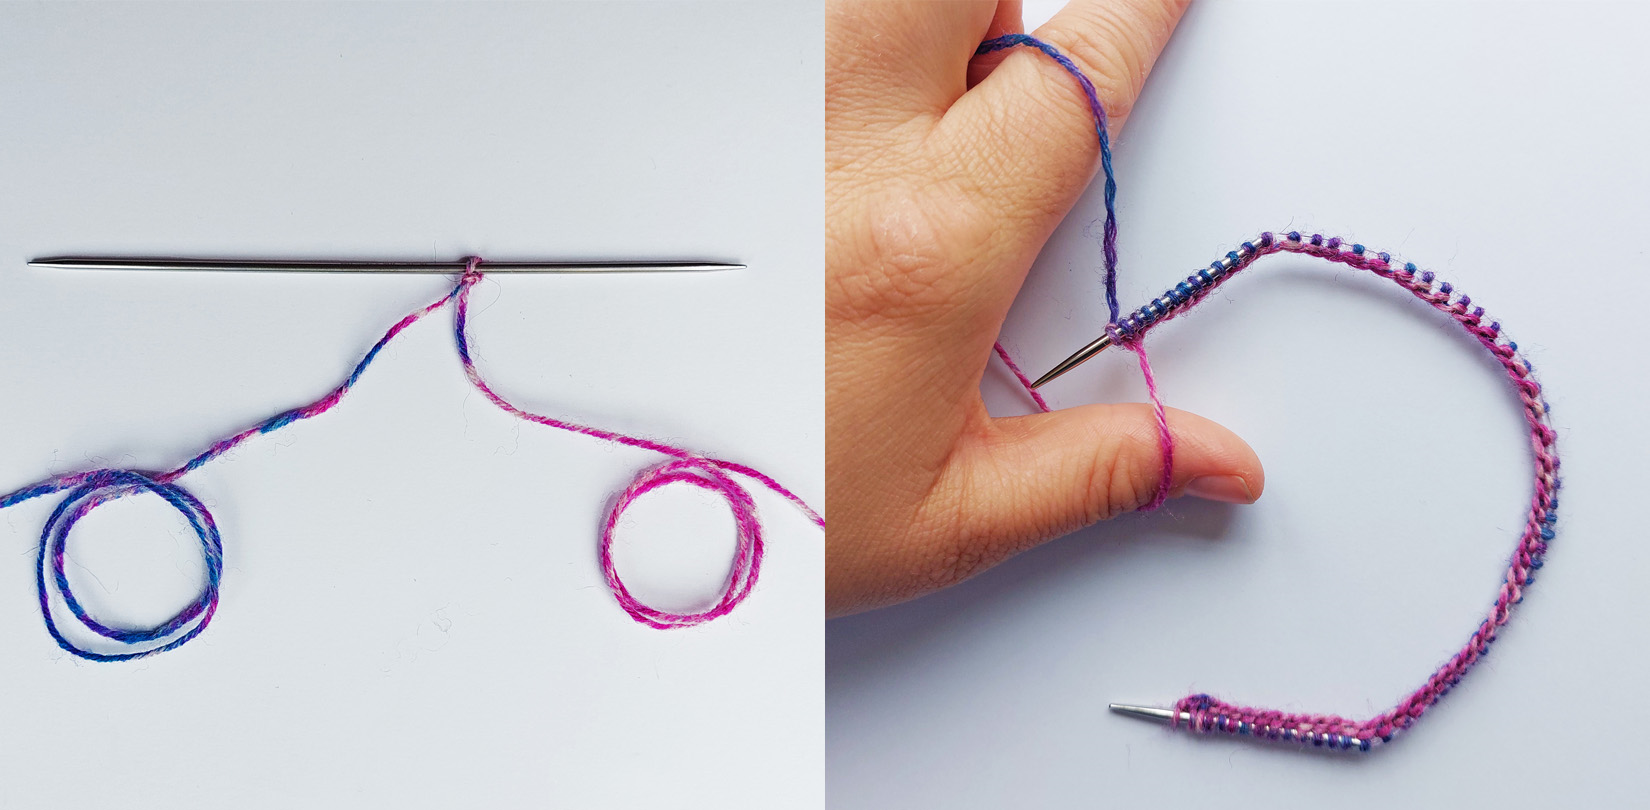
The best way to know you have started in in exactly the same spot for both sock is to make your first stitch right at the point there the yarn changes colour. Smart Knit It® patterns recommend using the Long Tail cast on method. To ensure the correct stripe placement whist casting on this way, the yarn tail should be held by the thumb so that the colour that the tail that creates the stitch is the colour you will continue to work with once the cast on is complete.
Starting the sock in this way will create a ‘mini stripe’ at the top of the cuff so if you wish to avoid this it will be better to start the cast on half way through the chosen length of colour though doing it this way can make it more difficult to get the exact same point in the stripe, twice! Another thing you can do is to choose a different cast on type such as the backward loop cast on – make the first stitch in the same place and just work forwards. Just remember, if you substitute cast on types, make sure you use a stretchy one!
2. Try to start/end the major points of the sock at the beginning of a colour change
For example, placing the heel at the start of a new colour. Doing this means that even if there are slight discrepancies in the yarn colour lengths or you miscount your rounds slightly, minor differences between your socks won’t be noticeable if the major points of the sock look the same. No one will then notice tiny discrepancies in between!
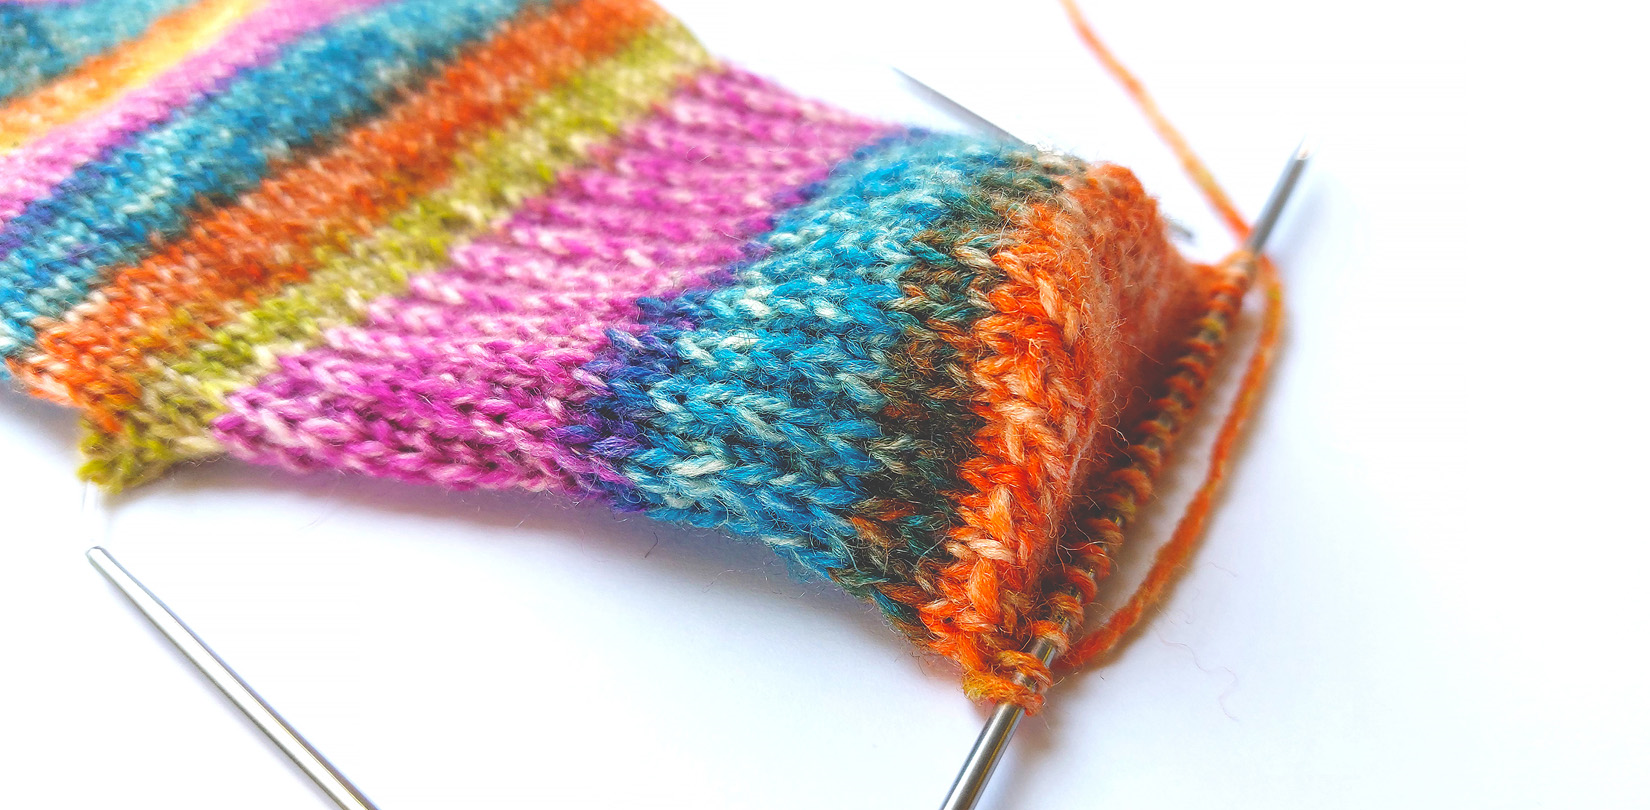
3. Be prepared to cut and splice your yarn if your stripes don’t quite match!
On the second sock of the Adult Basic Socks, despite starting the socks in exactly the same place in the pattern repeat, in order to get the stripes to perfectly match, the yarn was cut twice in order to replicate the stripes perfectly. The first cut was after the heel turn – there would have been a single line of orange stitches across the top of the sock if the yarn wasn’t broken here! The other place was right at the tip of the toe, the first sock naturally finished with the purple into blue colour just sneaking in but the second sock would have had an all-pink finish. This probably would have been better but the pink ran out just a smidge too soon for the first sock!
4. Knit your socks toe up!
Knitting sock from the toe up is somewhat more forgiving when it comes to the final few rounds. Providing you follow the previous tips in the same way, by knitting the cuff last, you can have a little more say in where to cast off. If a colour change is coming up and you don’t want to start the next, last off before you get to it. When you get the same point with the next sock, providing there the difference in row lengths isn’t significant between the two socks overall, cast off slightly earlier or later so that you end on the same point, ta-dah! You could be really cheeky and start casting off mid round in order to hit the optimum point in the colour change – another great thing with knitting in the round is that you can do this and no one will know!
Finally, the key to making successful socks is most definitely trial and error! It may take a few attempts to get the perfect fitting sock but you will find the formula that works best for you! We couldn’t recommend the feeling of being carefree strongly enough!! Who says socks have to match? Why not completely mix it up? Heck, the pattern was completely reversed on these socks! Did you notice? Just remember, it’s your knitting, you make the rules. Be free and have fun!